Having taken a year off to pursue other interests, we are getting back to the rockets, and are starting to get a bit more serious!
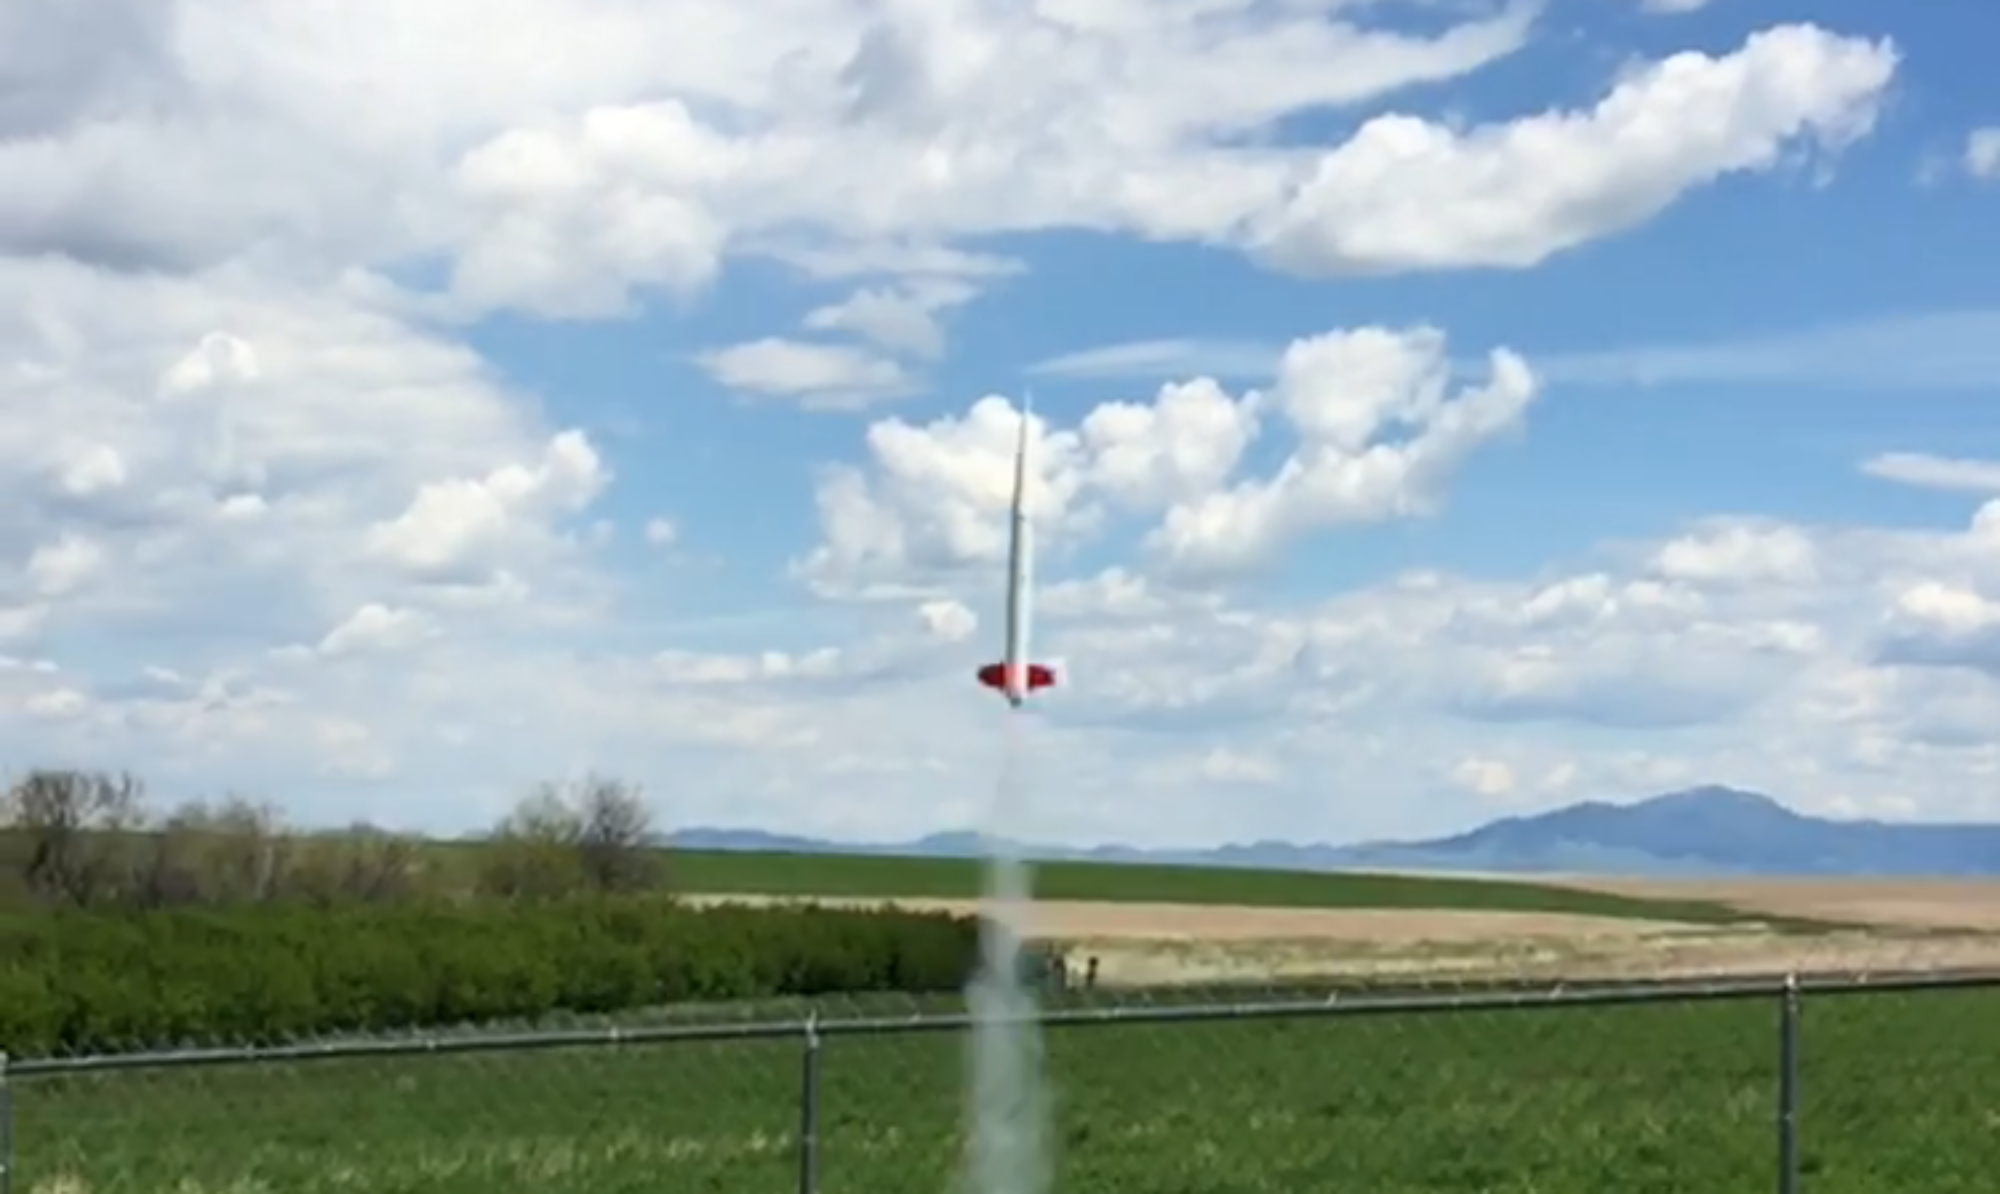
Having recently joined National Association of Rocketry, and with plans to pursue a High Power Certification in the near future, the latest launch involved one of the largest 29mm reloadable motors.
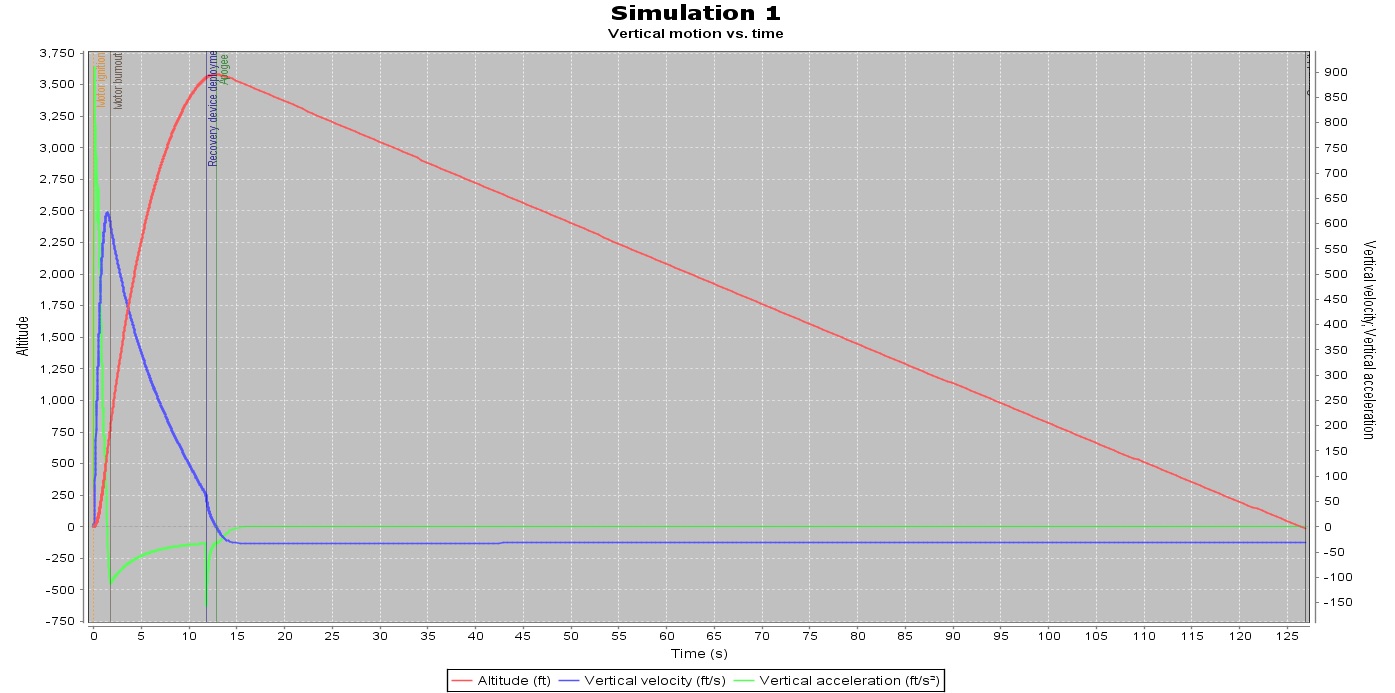
The simulations showed the rocket hitting appogee at 3581, which was
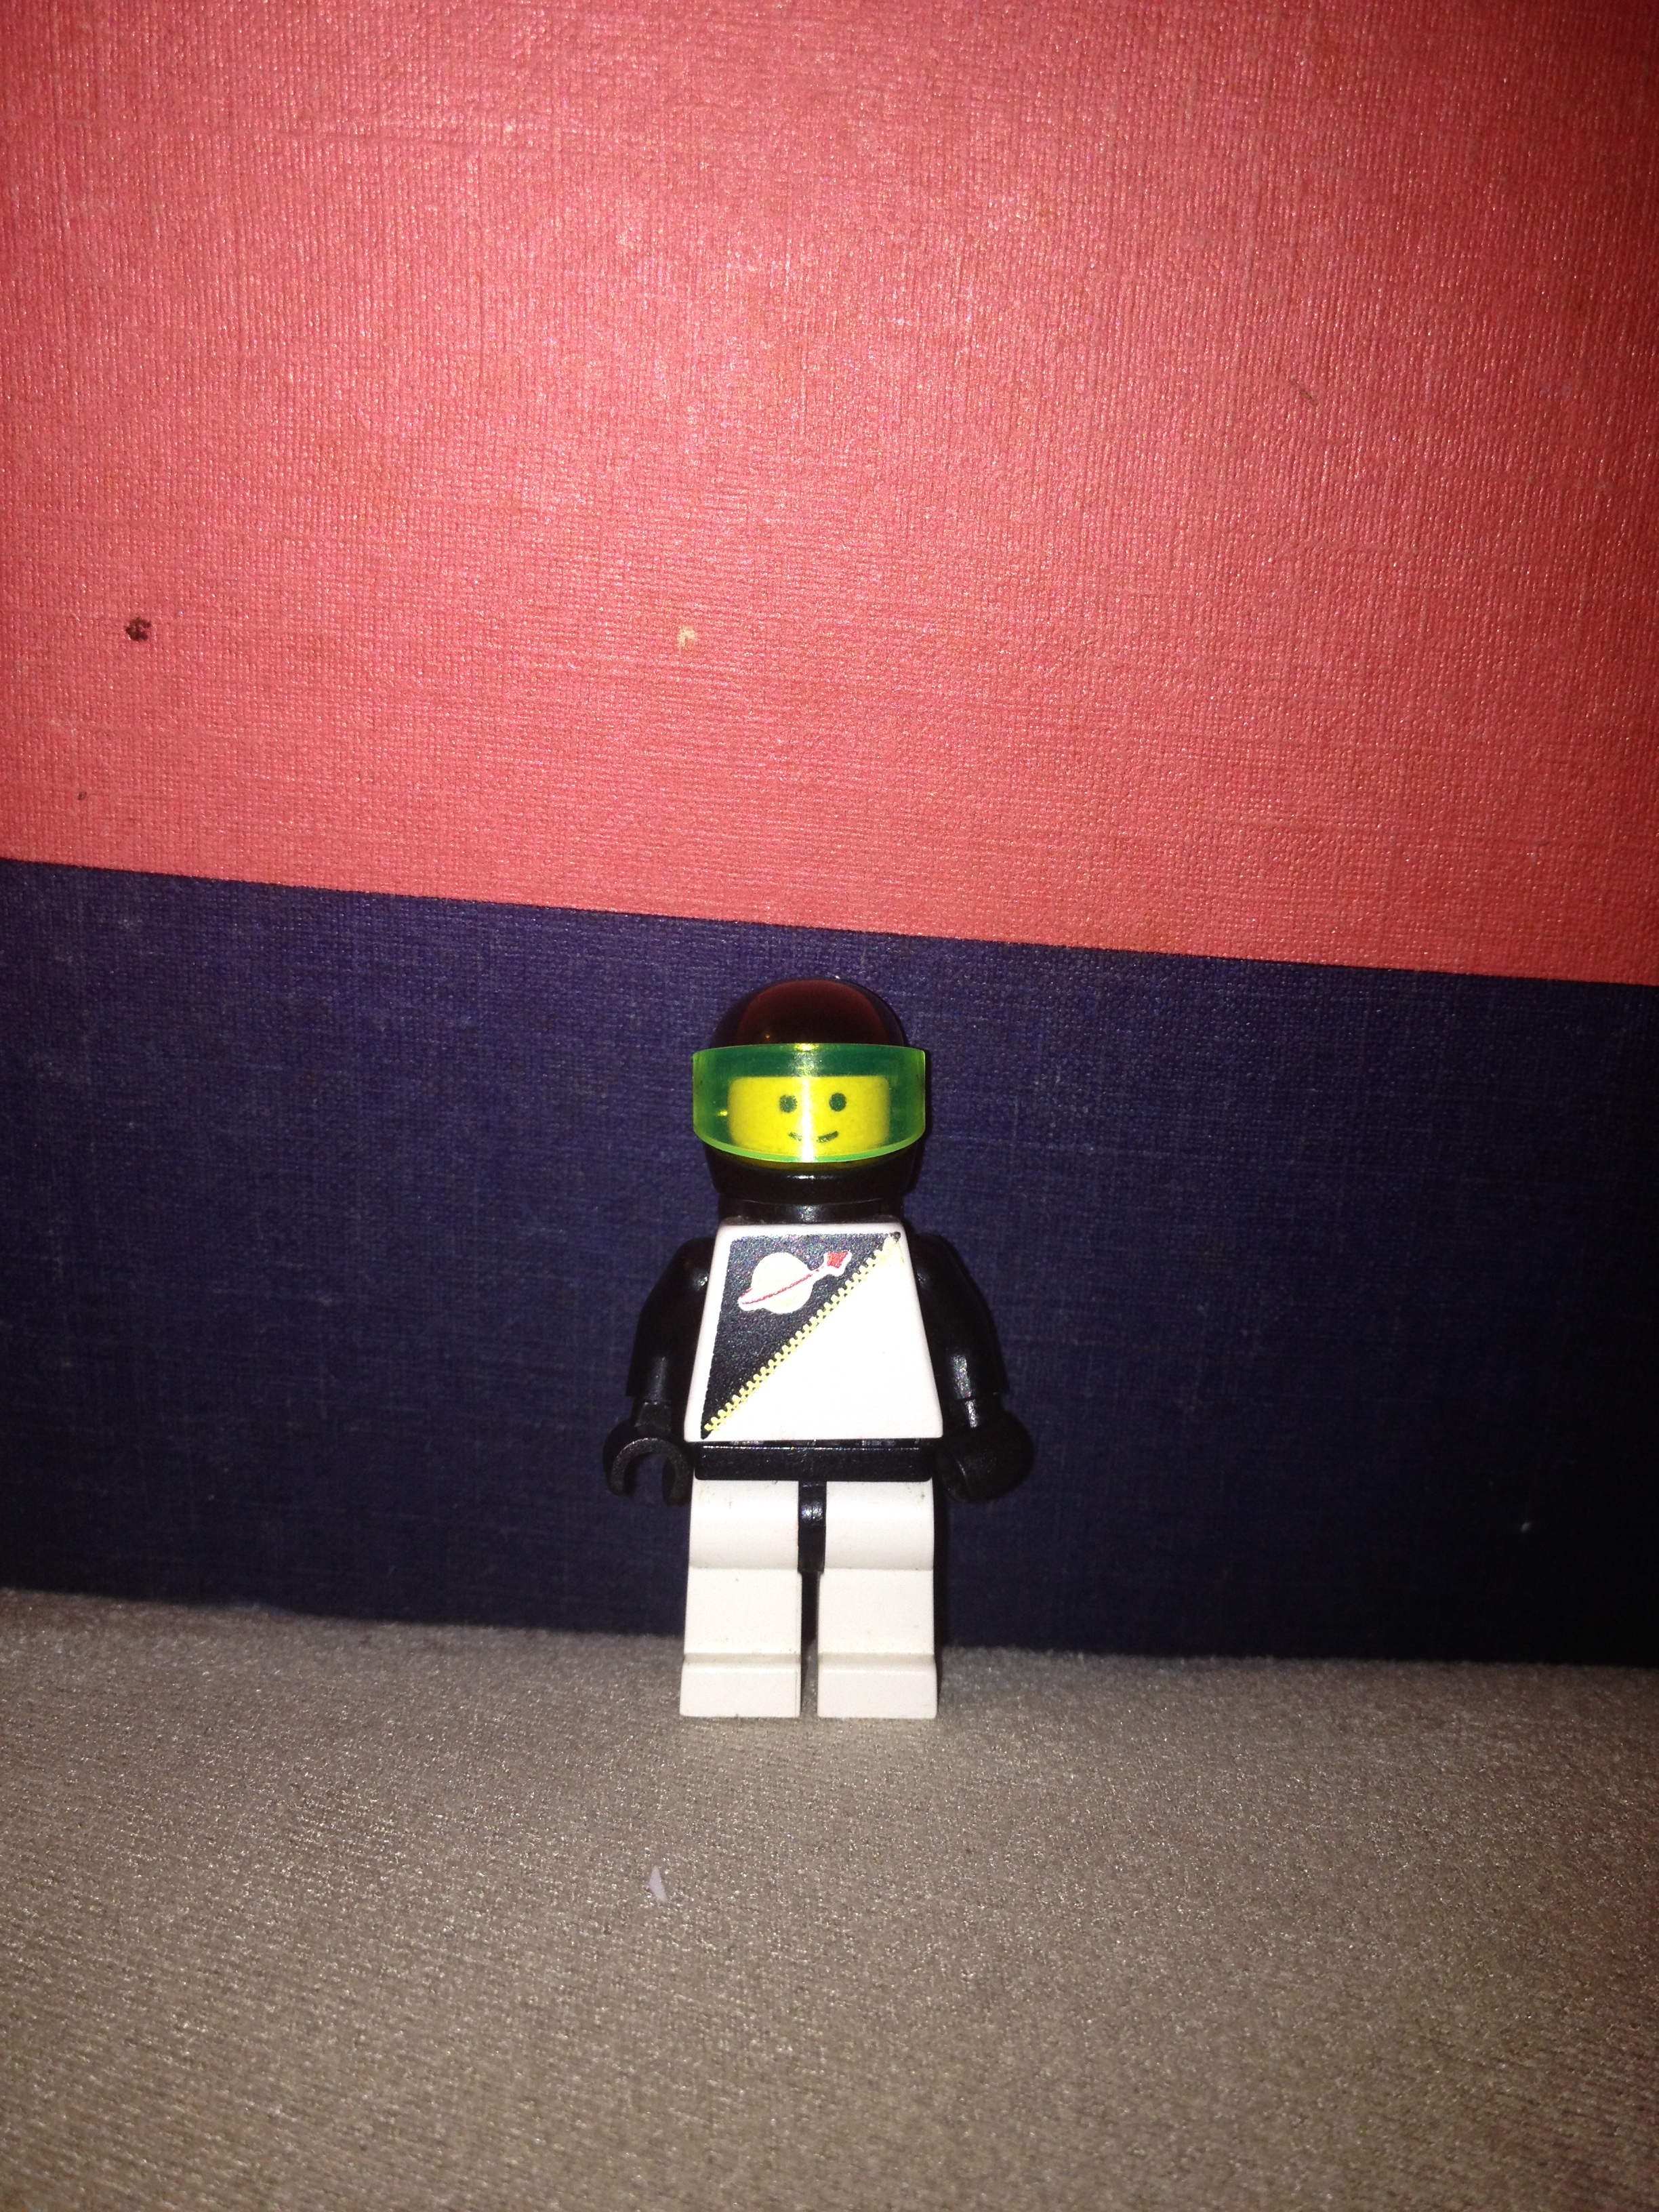
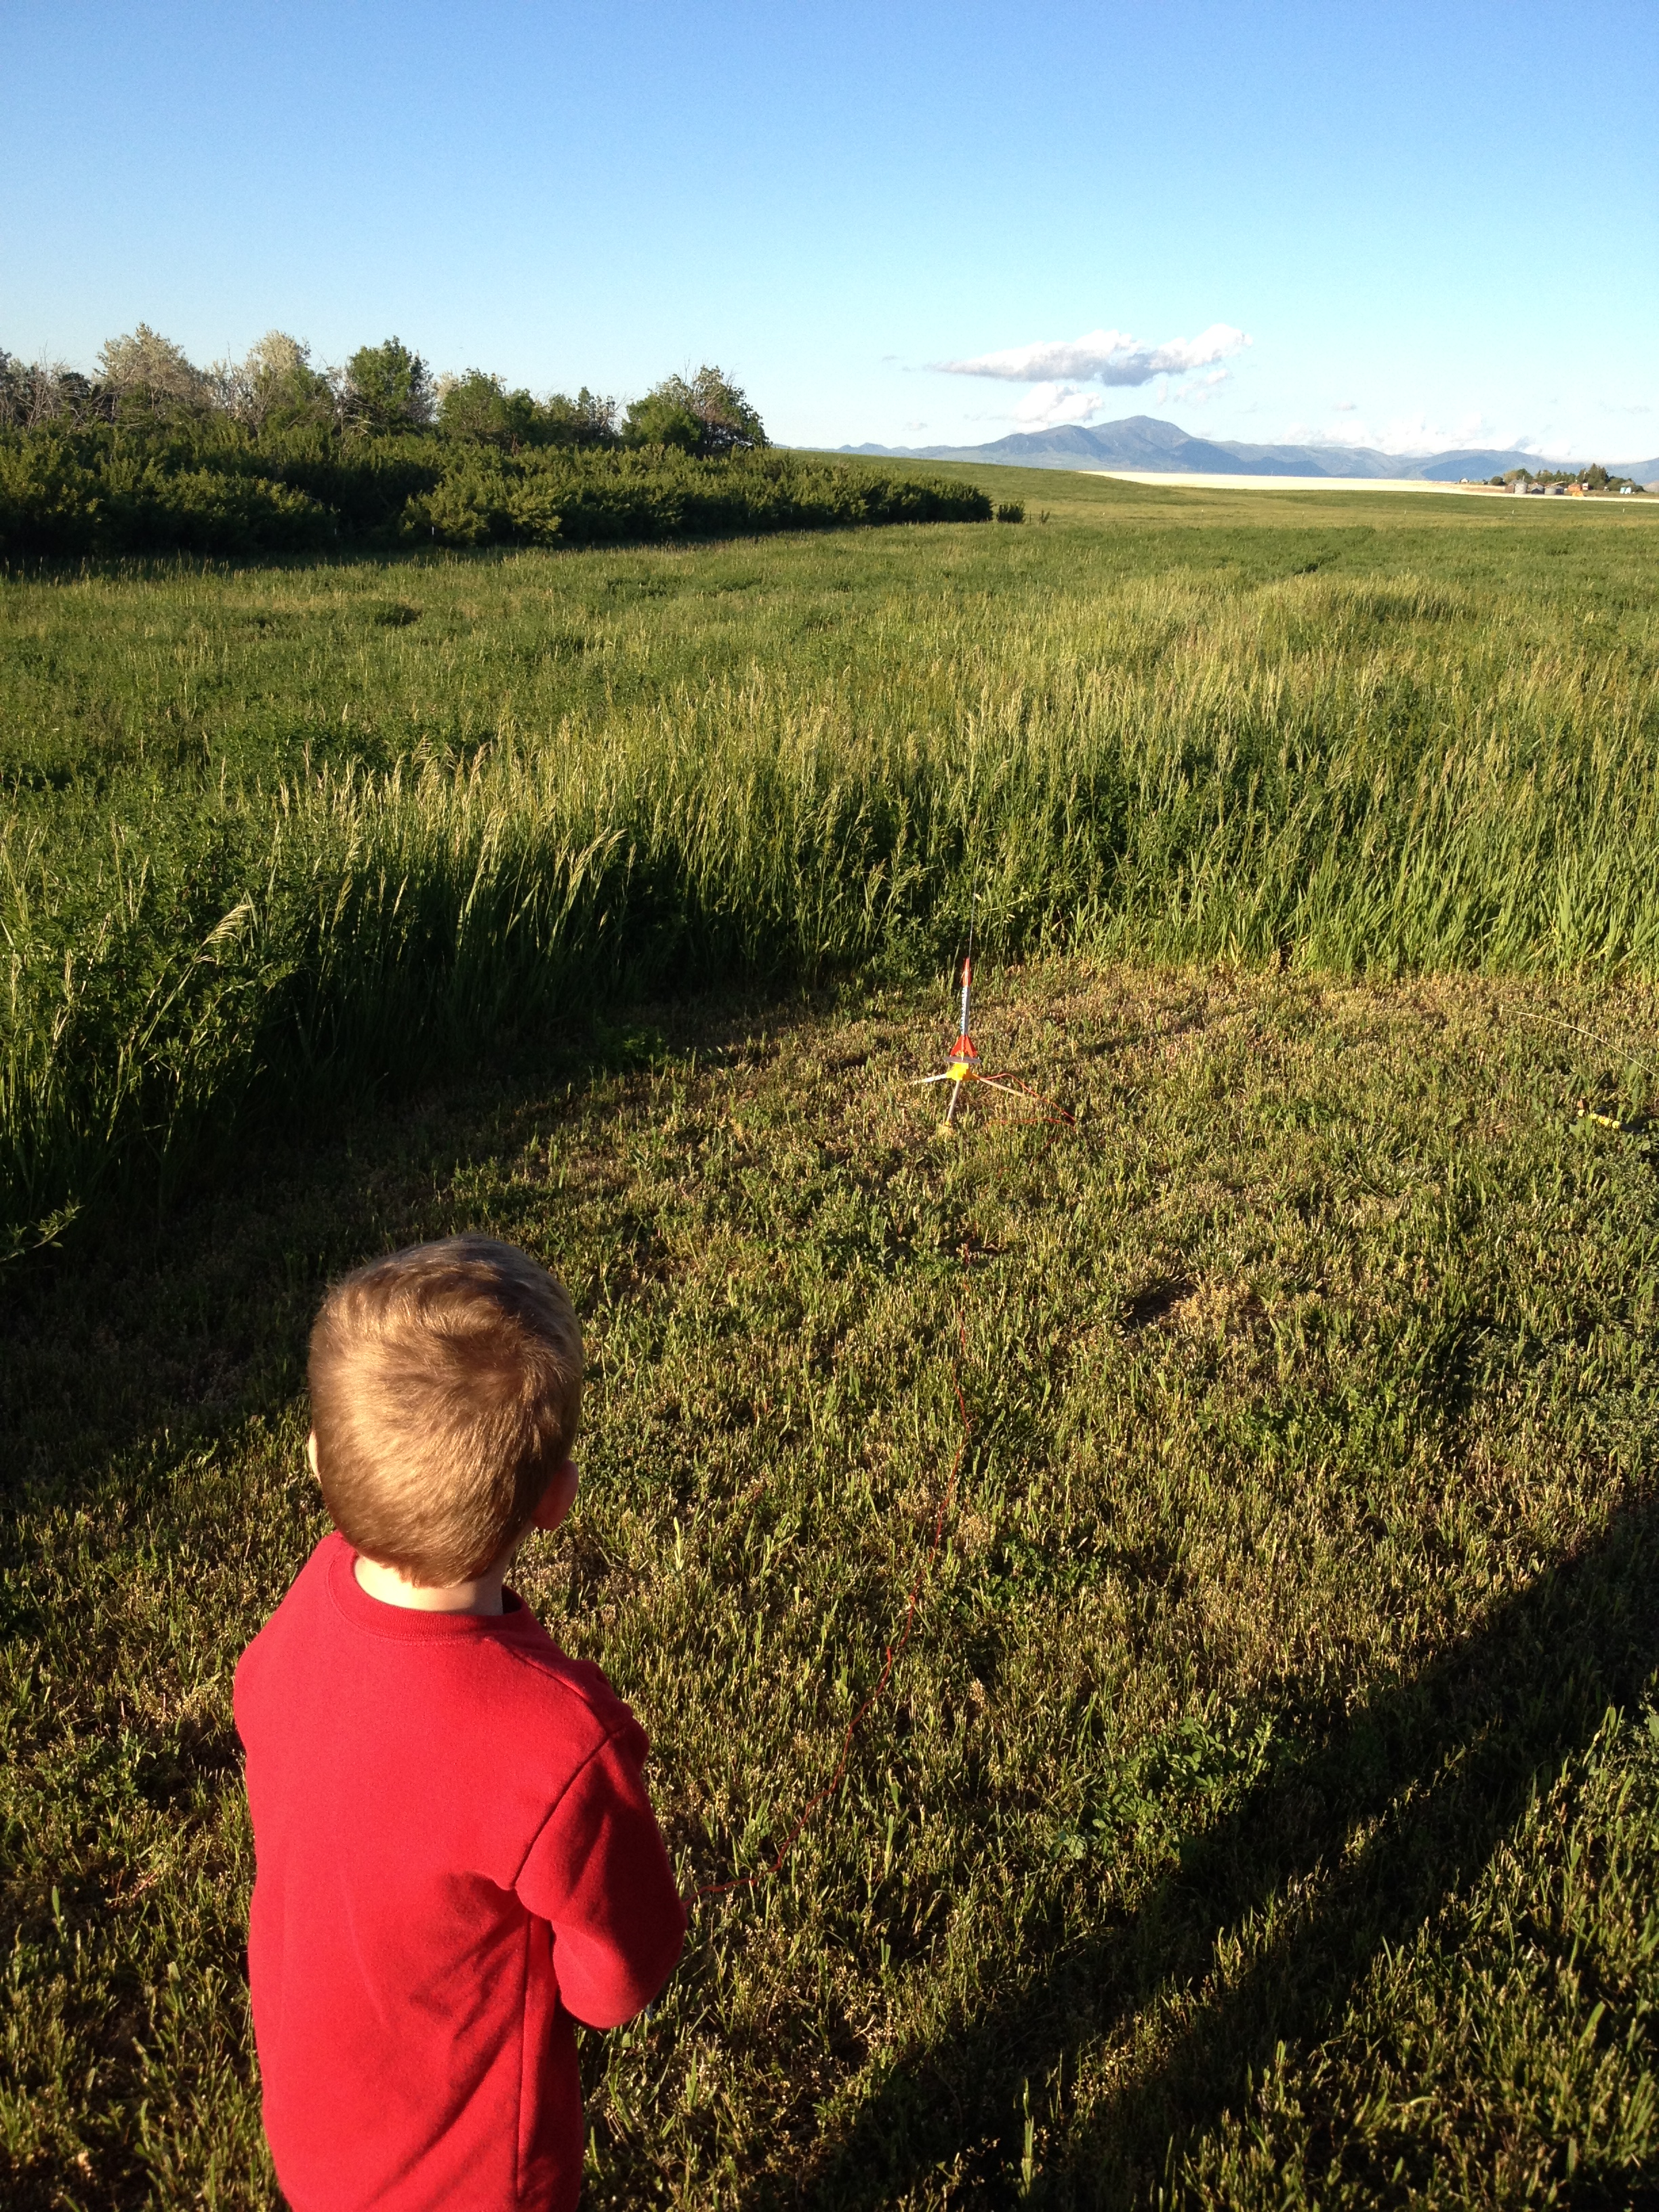
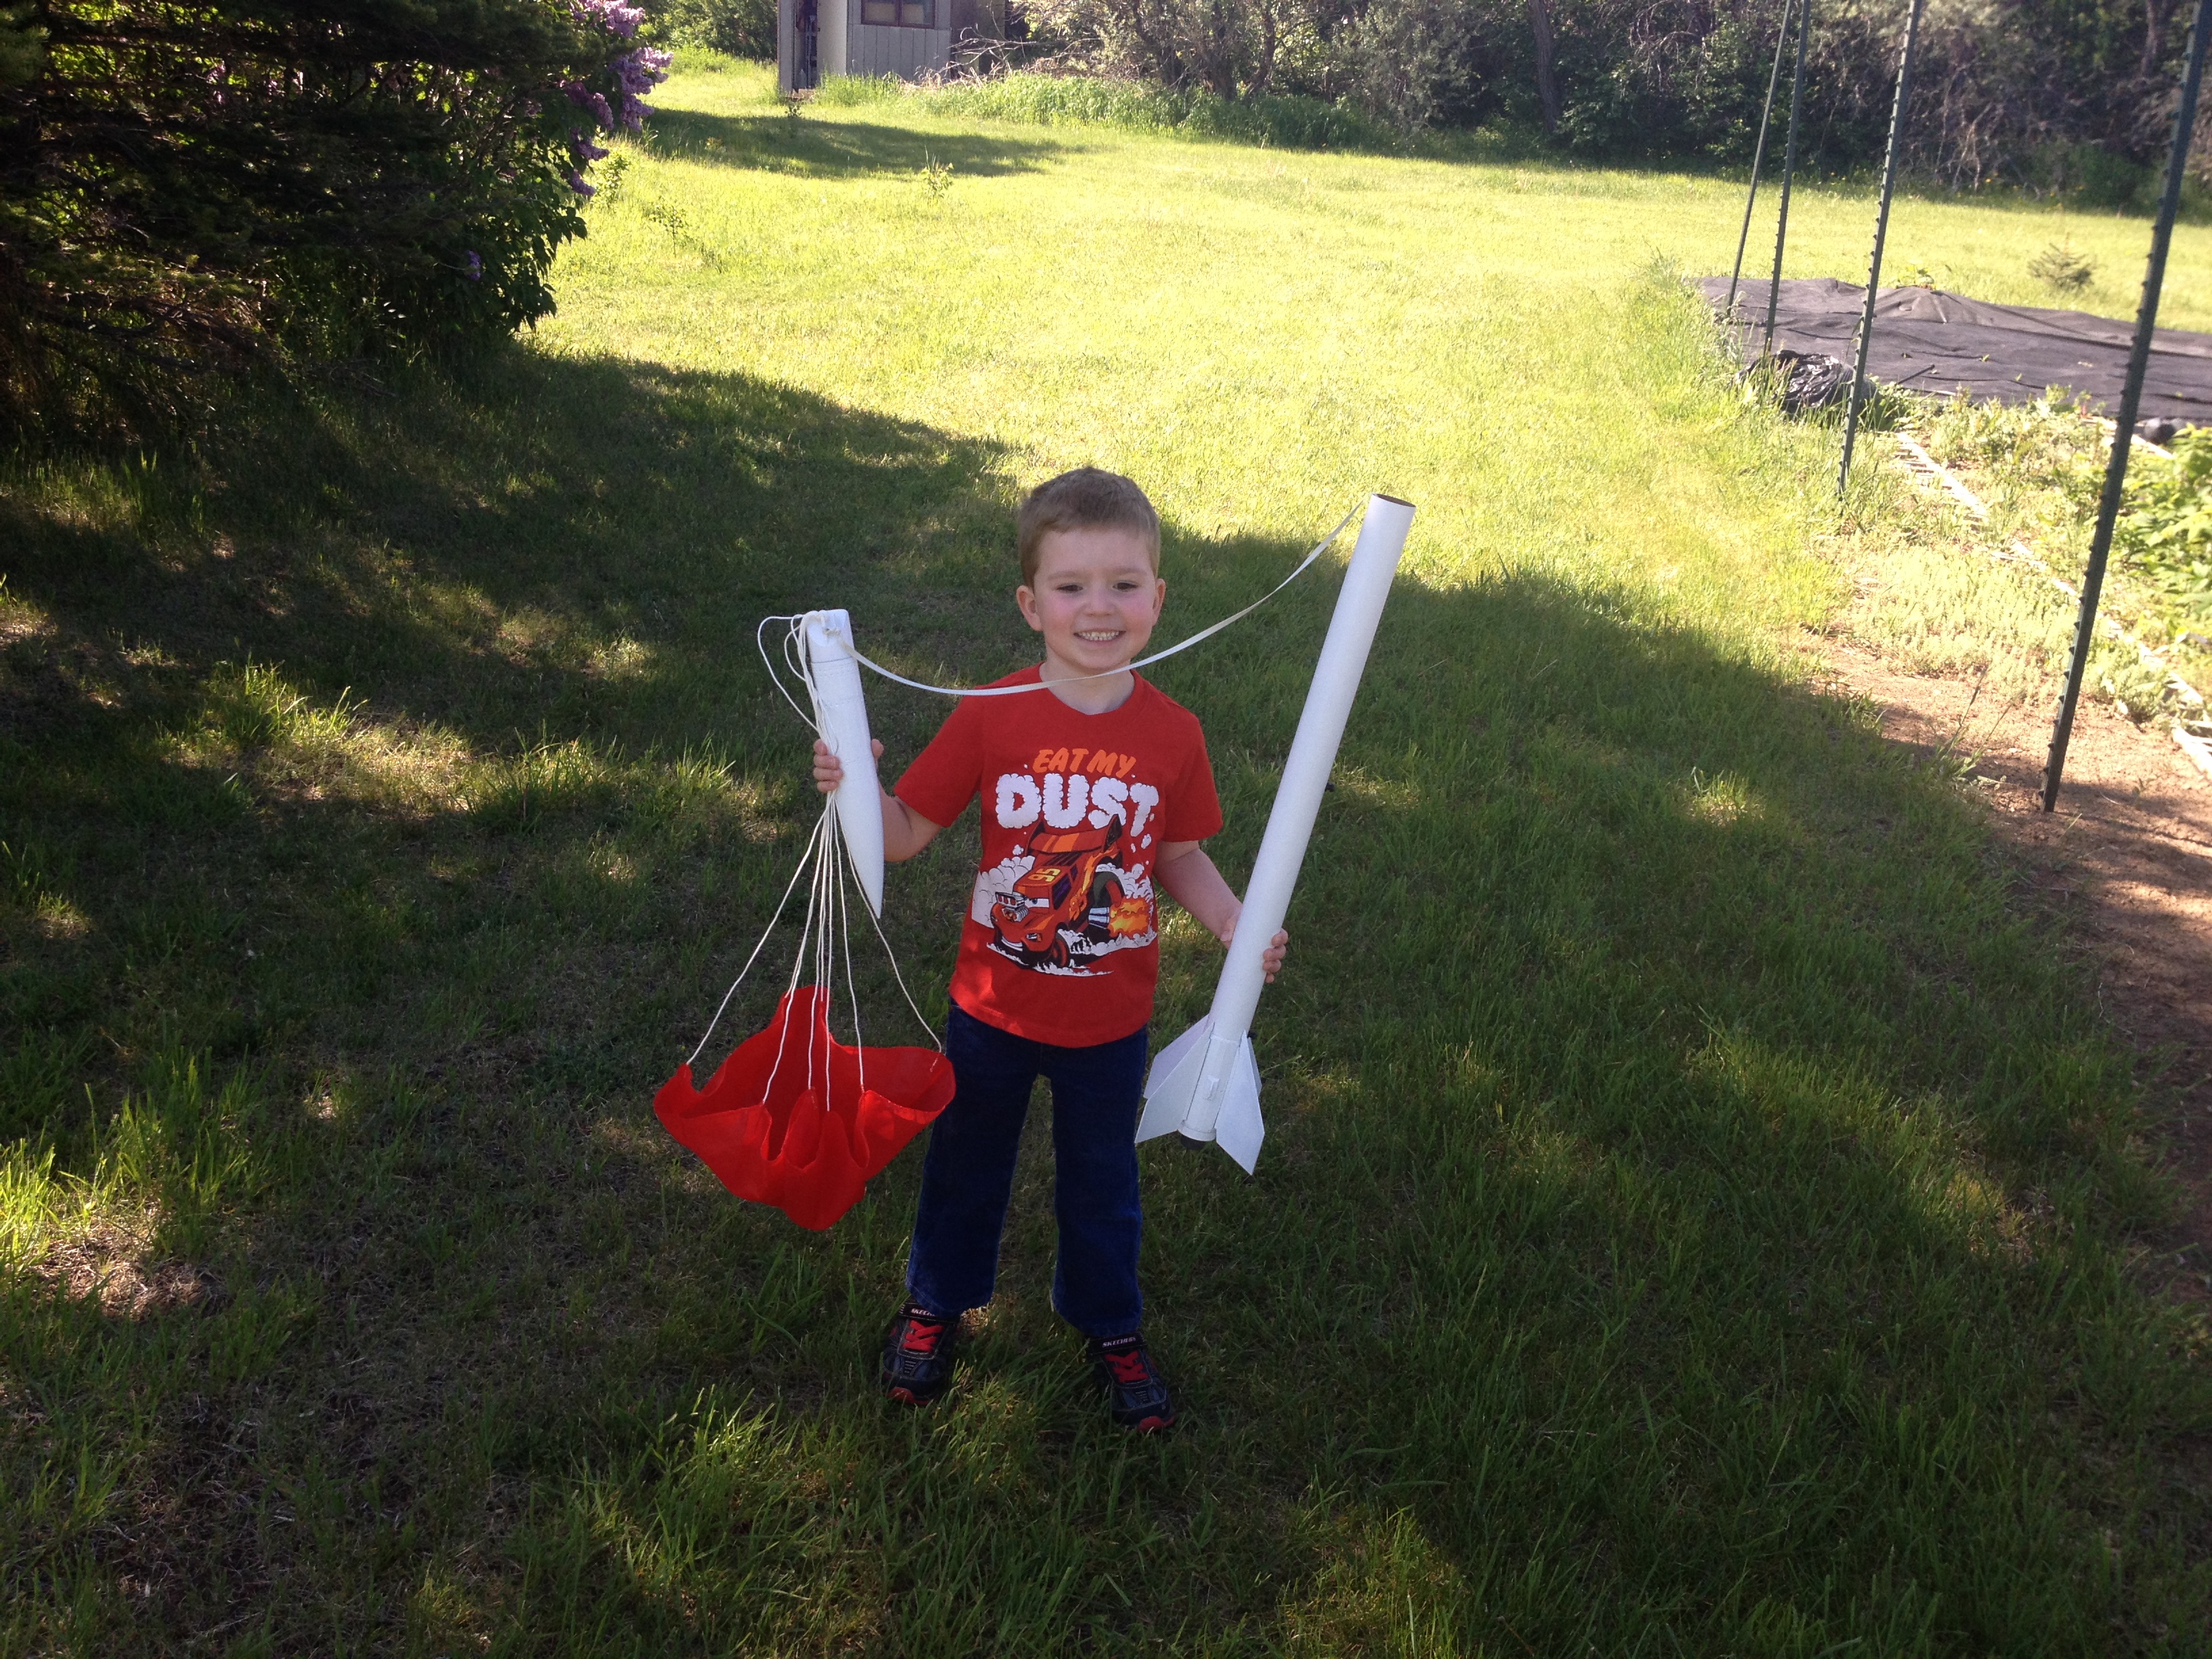
After spending a few hours launching the T-Bolt air rocket, the weather improved to the point it looked like it might be suitable for launching our Payloader II with its included Lego astronaut.
The first try didn’t go so well with the Estes C6-5 motor ignigting without issue but the rocket failed to leave the pad. It completed its burn and then ejected the nose cone and parachute while still on the rod. The pad was damaged with the motor having burned through the blast plate, plastic frame and scorching the grass under the pad. As it was so wet from all of the rain, this wasn’t a problem as far as a grass fire was concerned.
After examining the rocket, it appeared to be in good shape. The failure to leave the pad appeared to have been caused by the engine retaining hook which was pushing on the launch rod. This may have caused the rocket to hang up, although the rocket seemed to slide easily on the rod.
After a reset of the chute and loading another motor, we set it up again with one of our old pads. This time it worked as expected and the rocket blasted into the sky.
The rocket flew pretty much straight up and disappeared against the high clouds for a few seconds until the chute popped and we then began tracking the rocket as it descended. It took over two minutes to finally come back to ground almost a half mile away in two to three feet deep grasses. Luckily we had a retriever with us who was able to sniff it out and make the recovery.
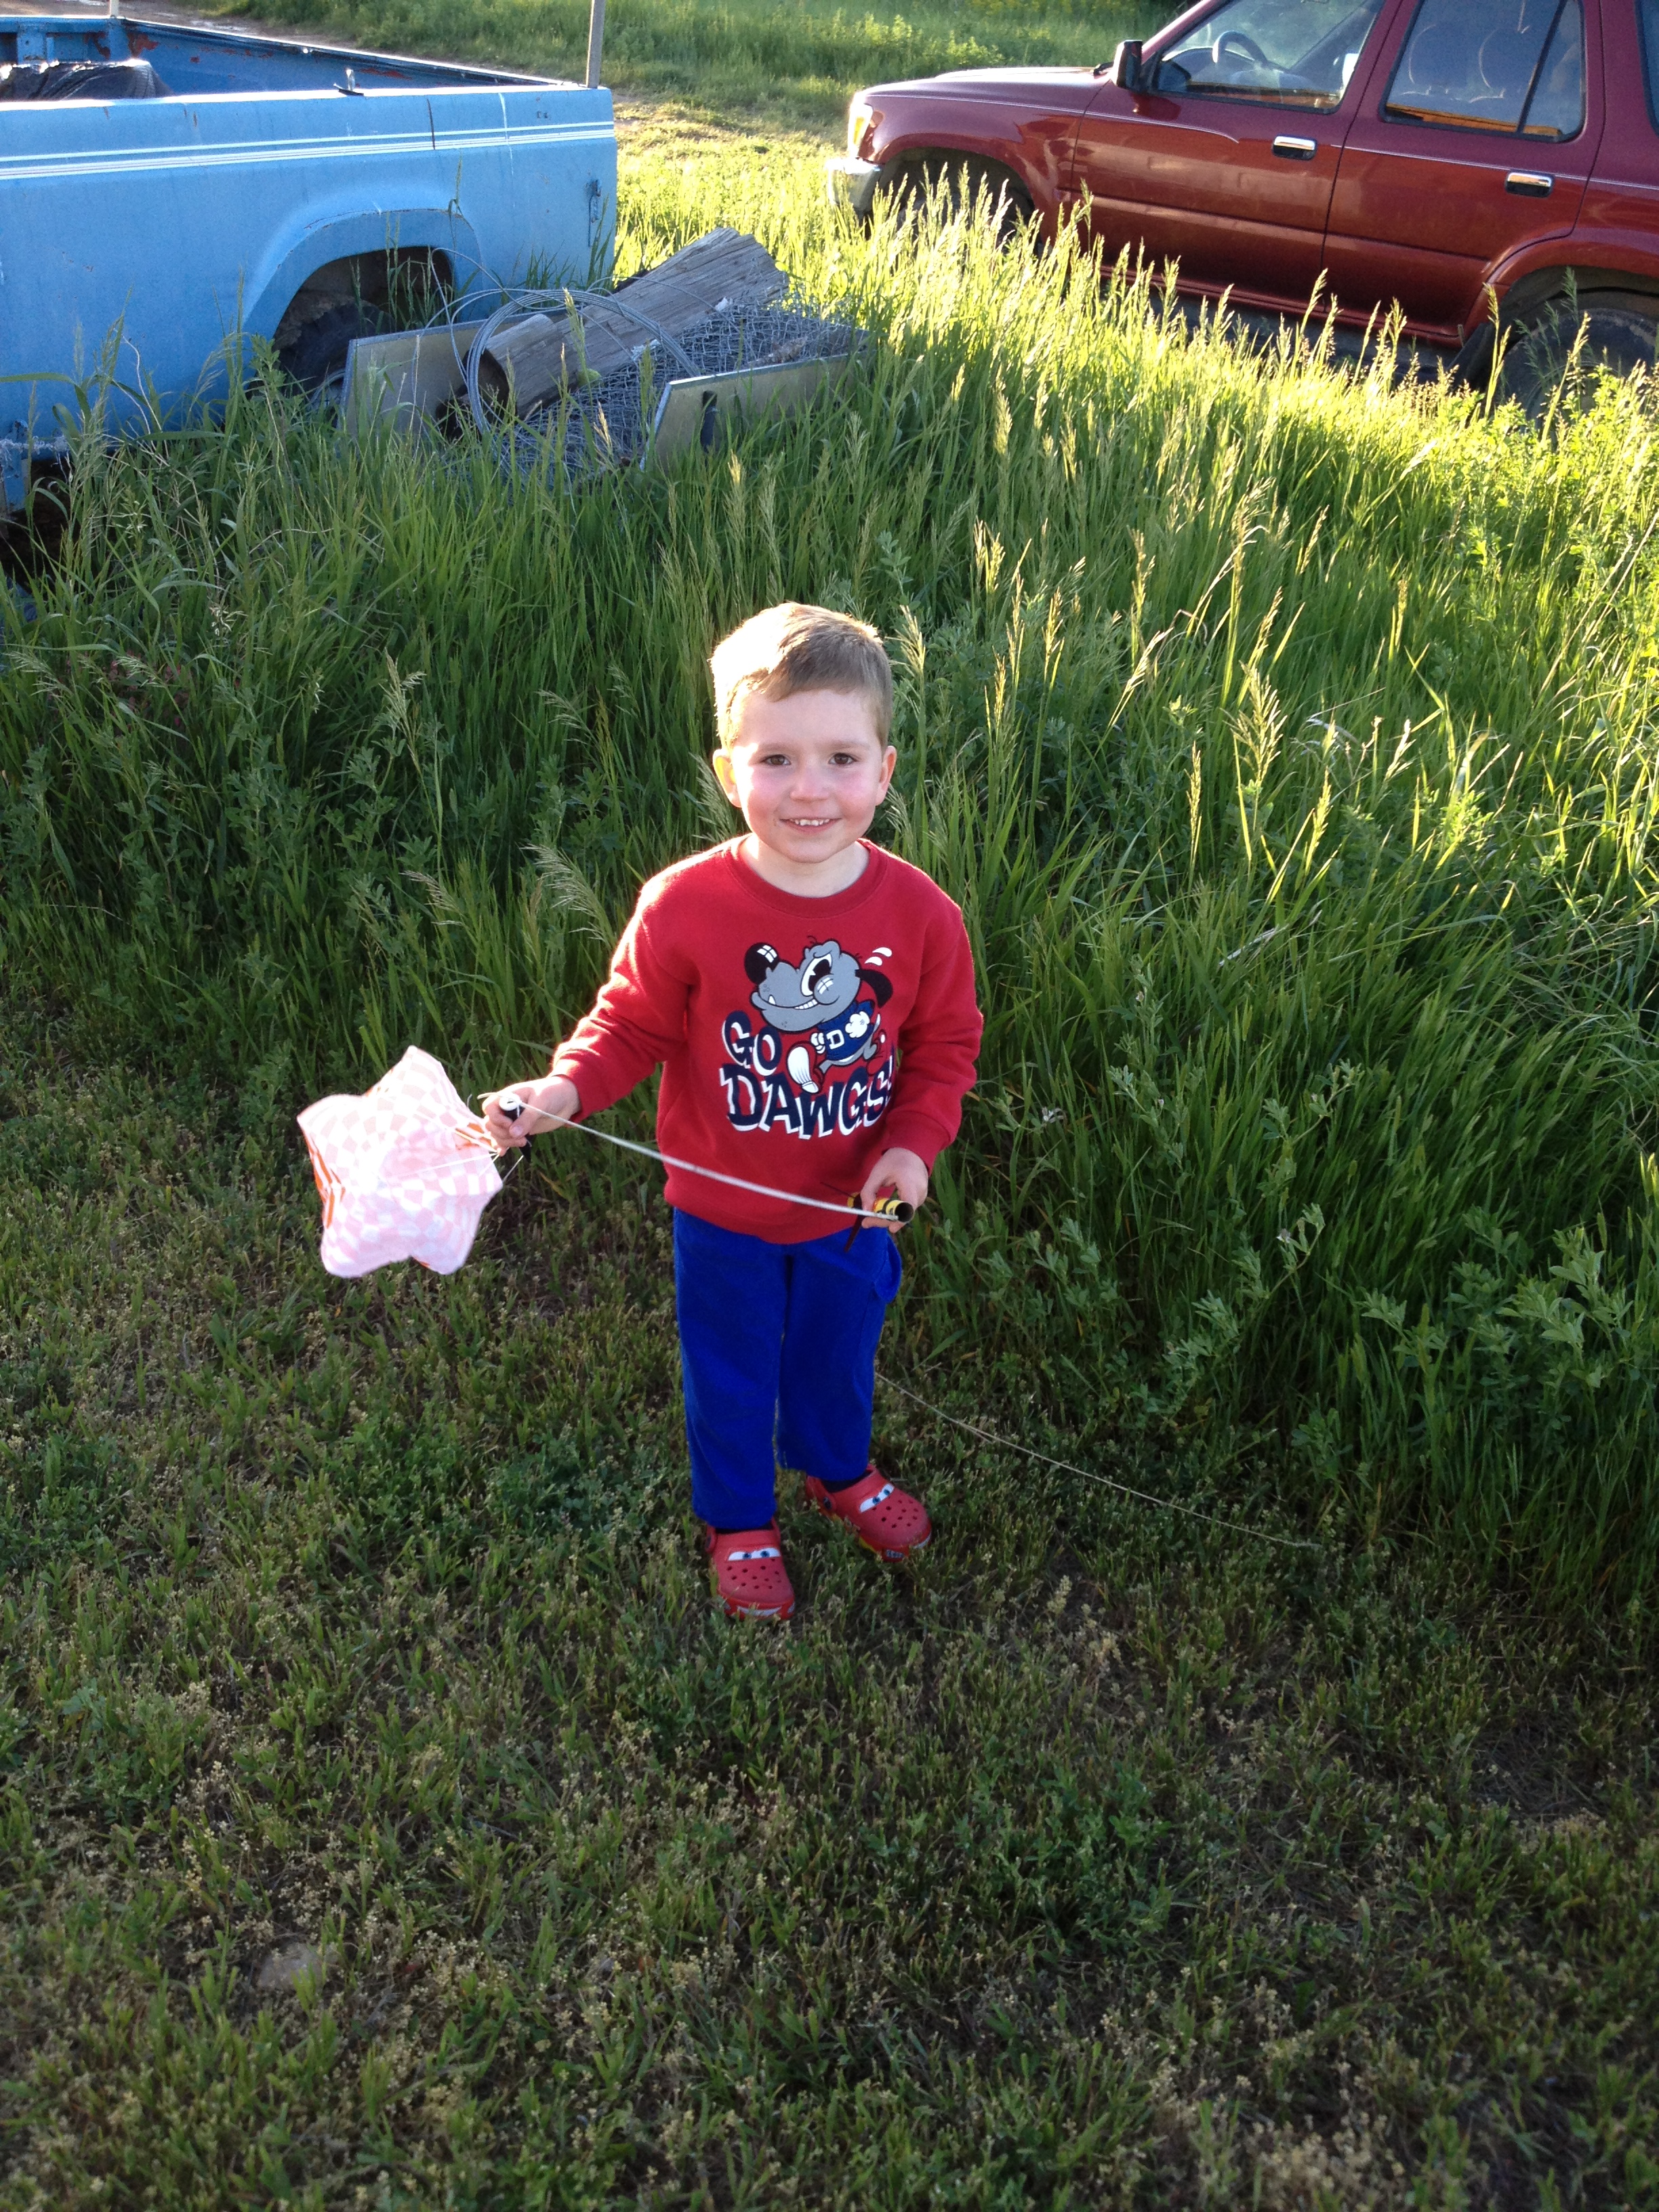
But we soon noticed that it was missing the nose cone and the Lego astronaut and figured it must have come off when the ejection charge fired as the eye-bolt that had been screwed into the base of the cone was still attached to the shock cord. Although it was a long shot, we began to walk around under the area where the chute deployed with the hopes that we might be able to find part of the nose cone. It must have been Iain’s day since we found the nose cone laying in the driveway on the opposite side of the shelter belt. The nose cone had only sustained a little damage, and the Lego astronaut was in perfect shape!
He’s happy to be back on the ground after almost being incinerated and then falling back to earth with out any sort of recovery device!
After being without any rocket motors for a few months, we got a few packs to try out some of the small rockets. Iain helped load the motors and ignitors in the rockets and then used his Estes mini-launch pad and controller to send the rockets flying. Both rockets launched without issue and were successful recoveries.
The second rocket (see video below) must have hit some strong wind as it curved over after burnout and was halfway back to the ground before the parachute popped. The fin can came loose but was easily glued back on and both rockets are ready to fly again!
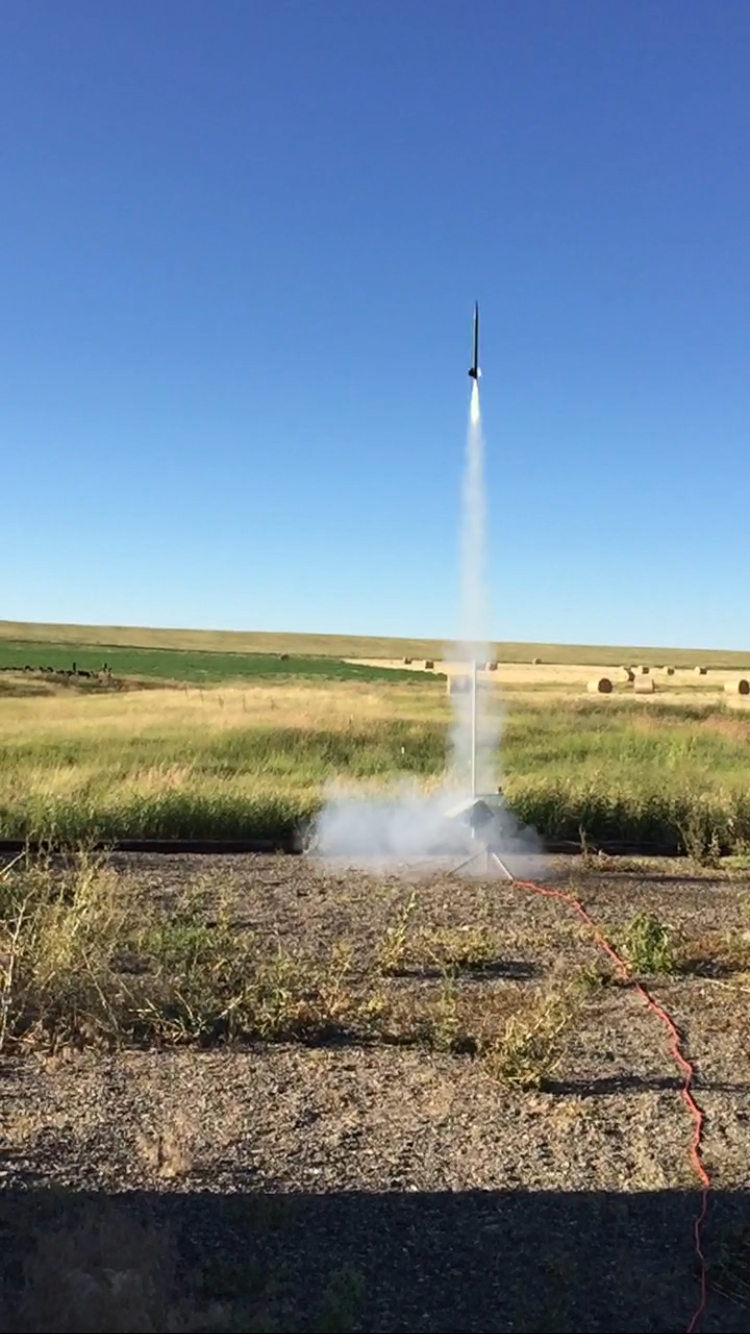
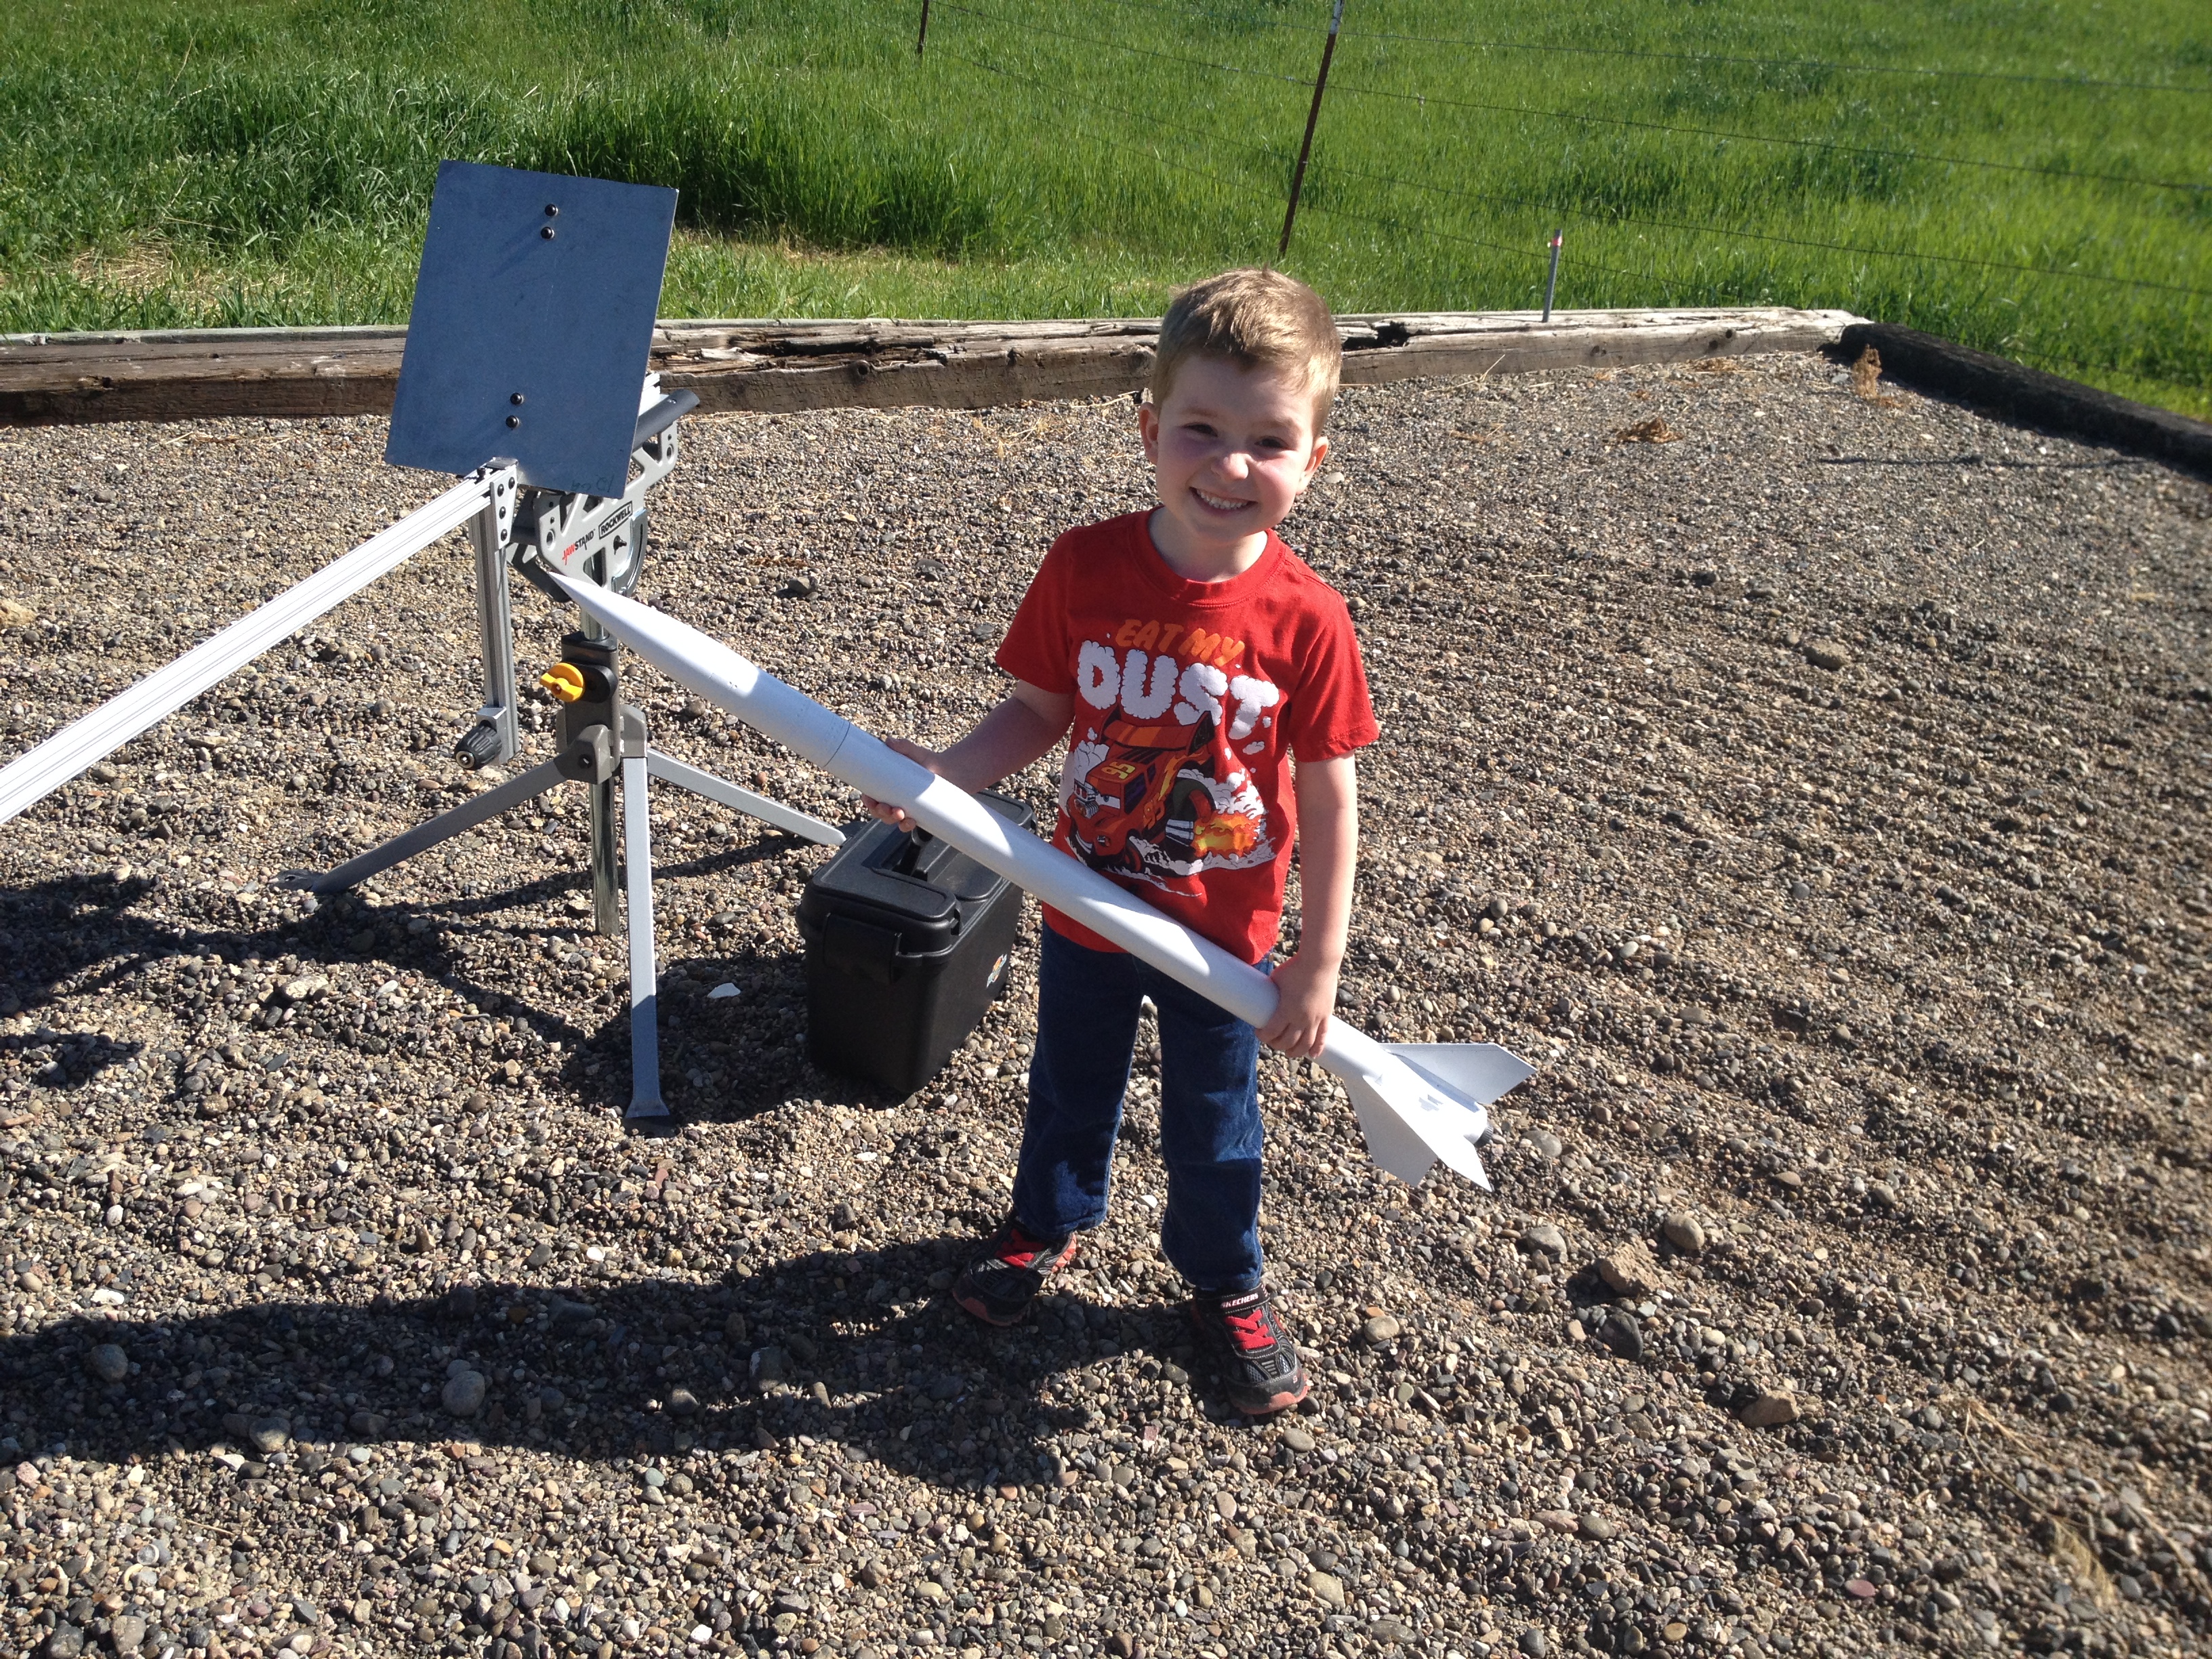
After a long delay, we had a perfect day for a launch and decided to send the Estes D-Region Tomahawk up for the first time!
This rocket has been in the building phase for a few months do to a delay in the painting process, but it was complete enough to have a first launch. The final paint and clear coat could wait.
I think someone is very happy!Its as tall as he is!
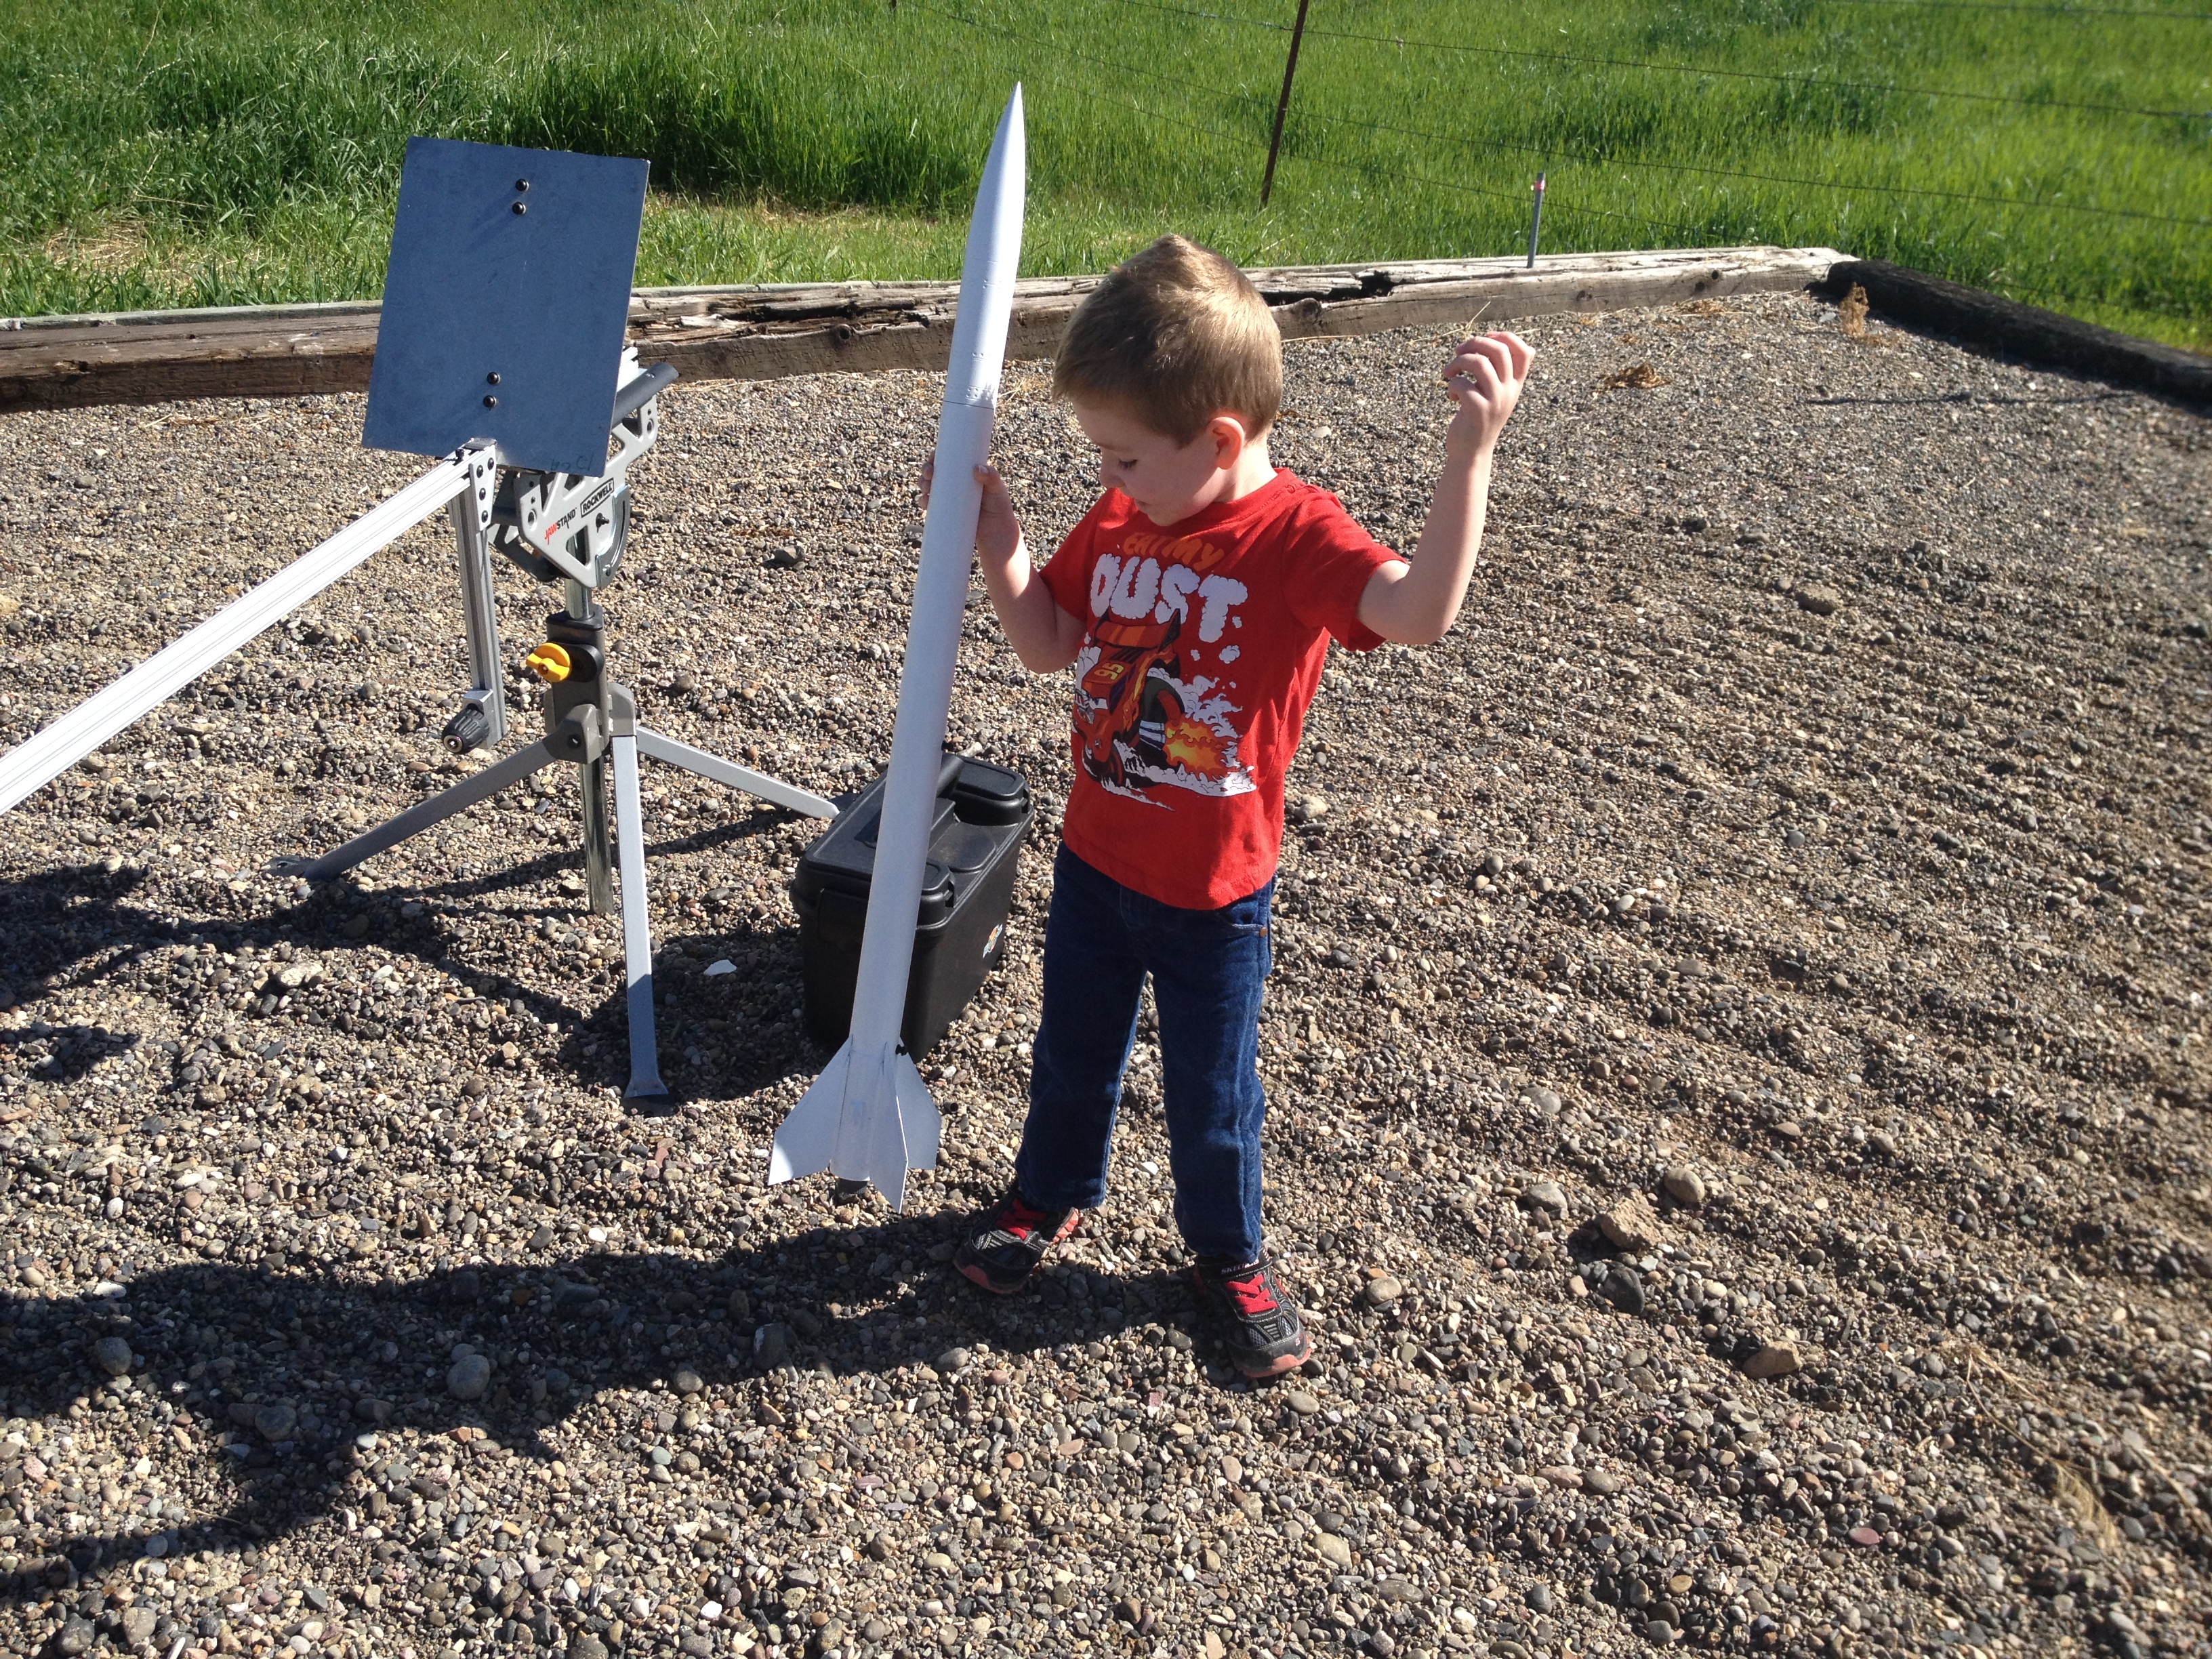
This is currently the largest rocket in our fleet, and we were hoping for a good flight on an Estes E9-6.
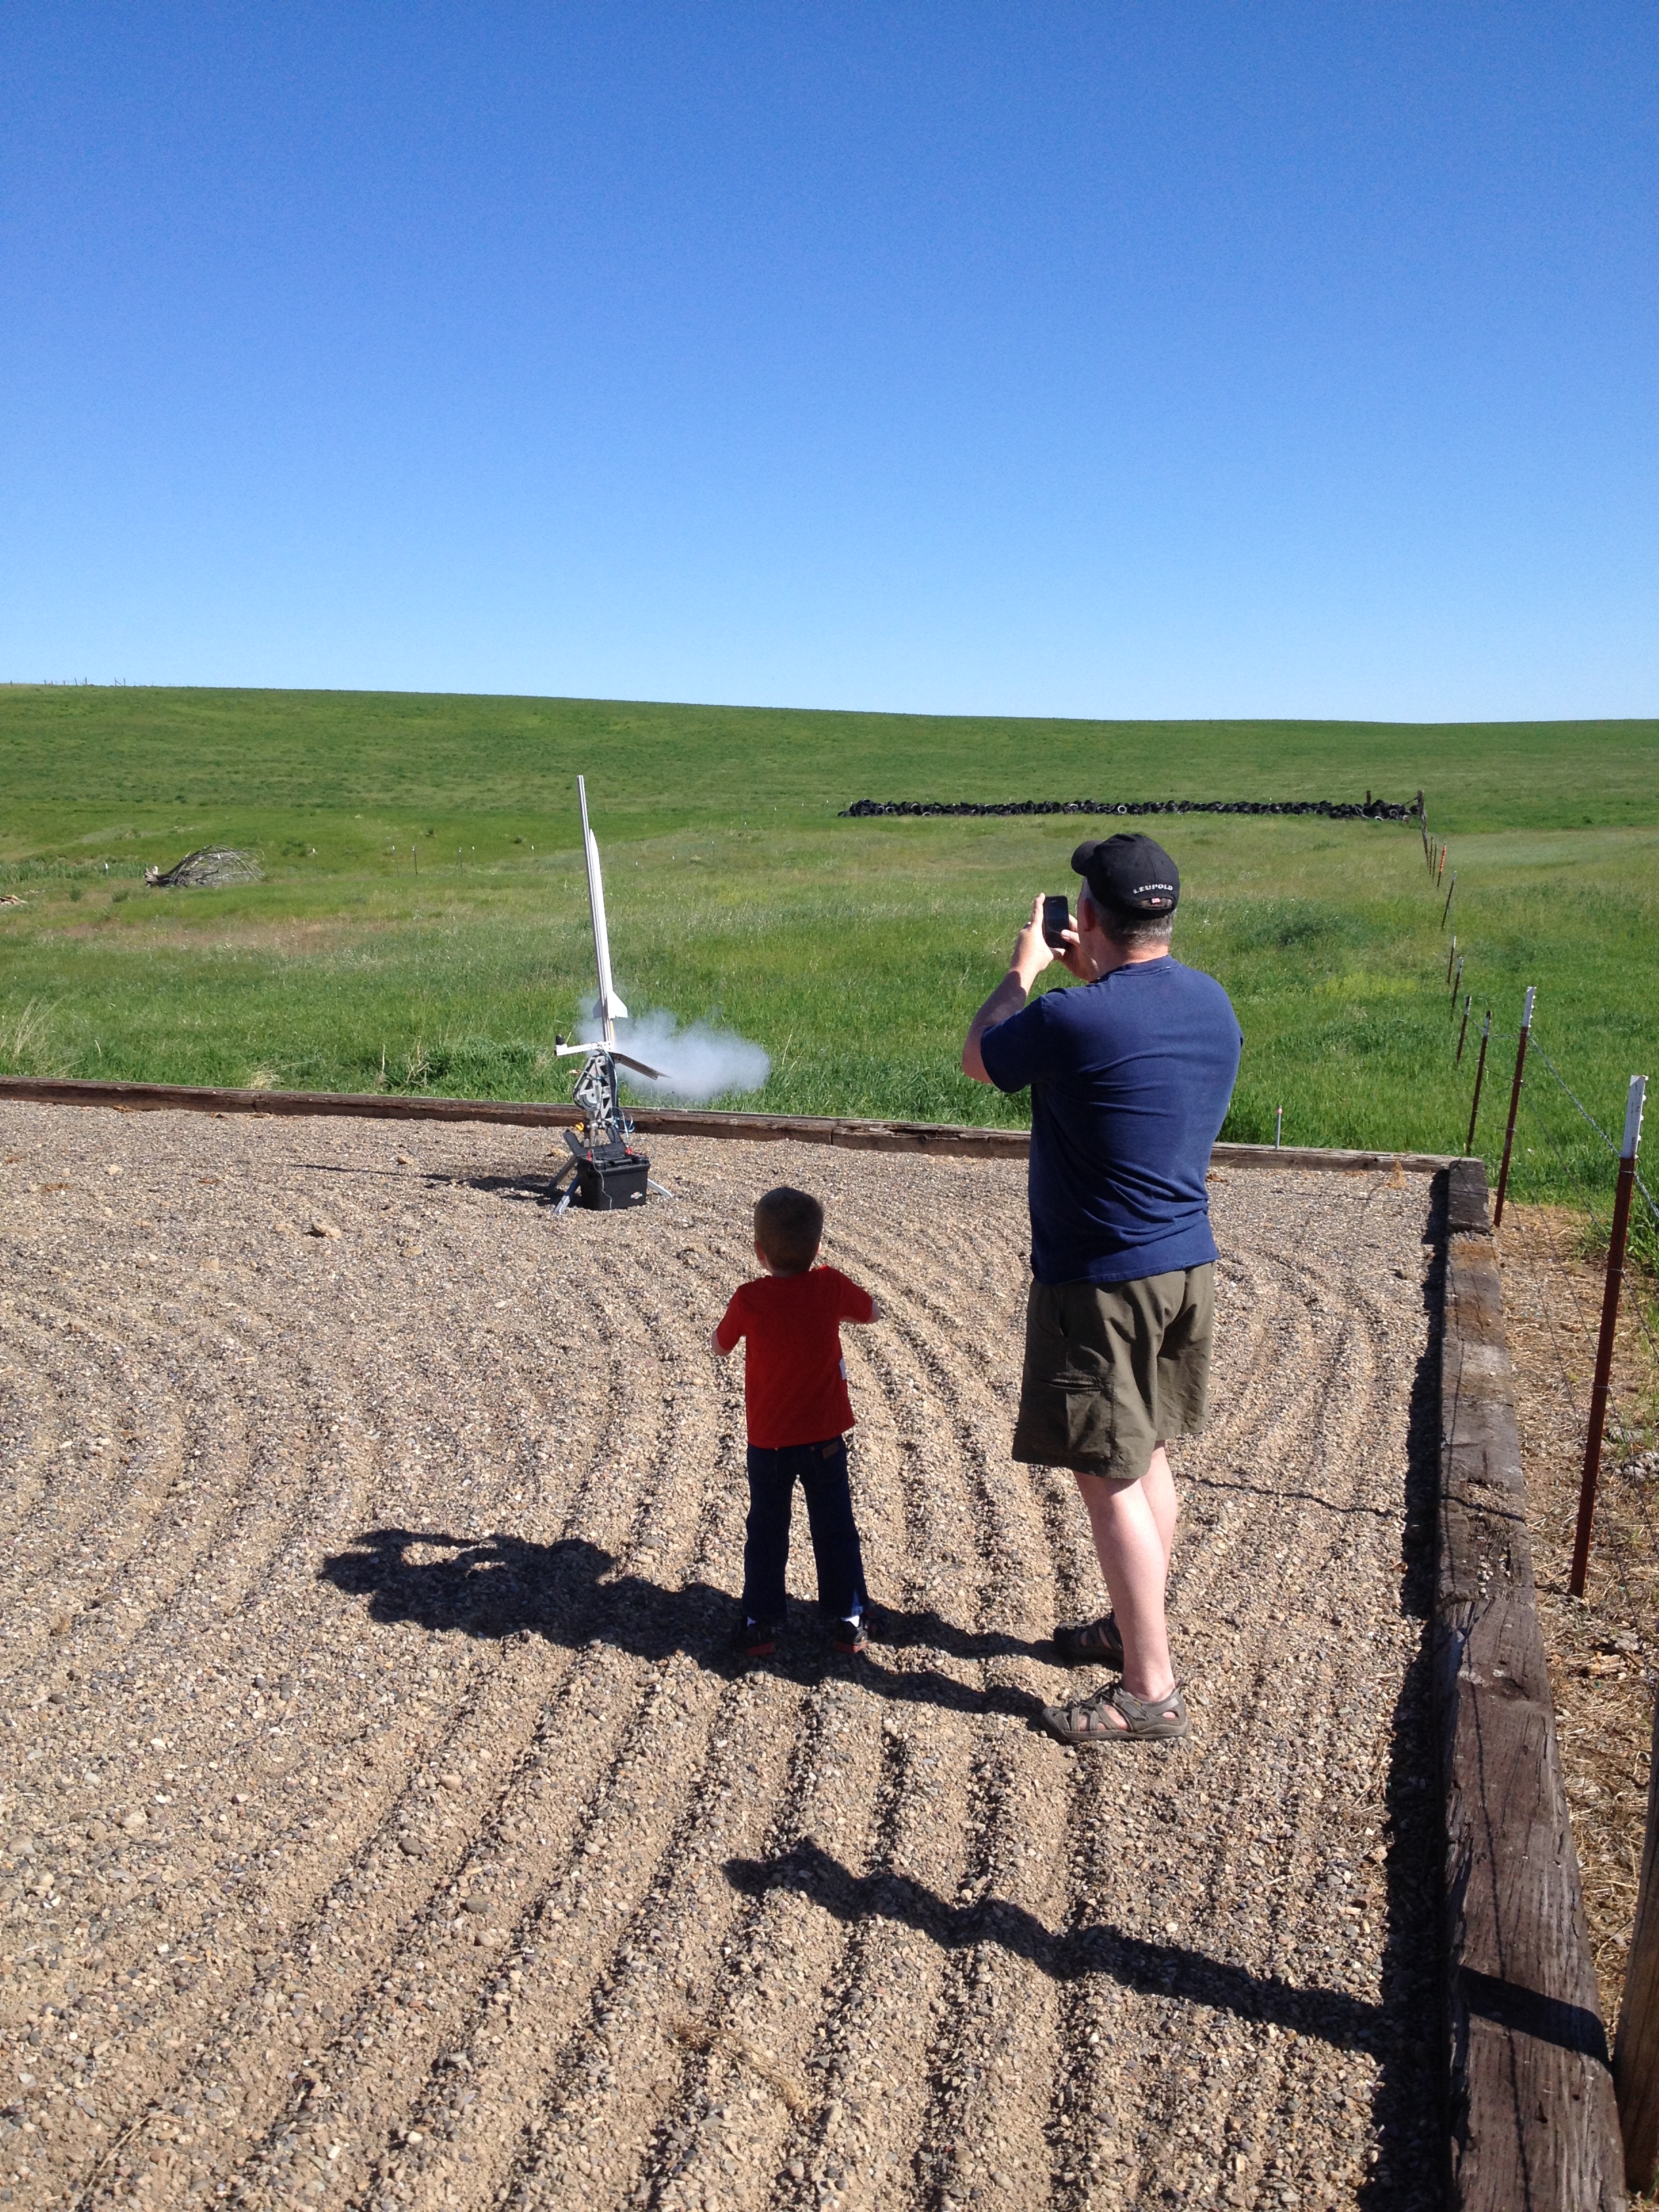
Once the rocket was loaded on the rail, we tilted it up and prepared for launch. The launch controller was hooked up and showed good continuity through the ignitor sothe count down started!
5, 4, 3, 2, 1, Launch!I was a little slow on the shutter and the rocket had already left the pad.
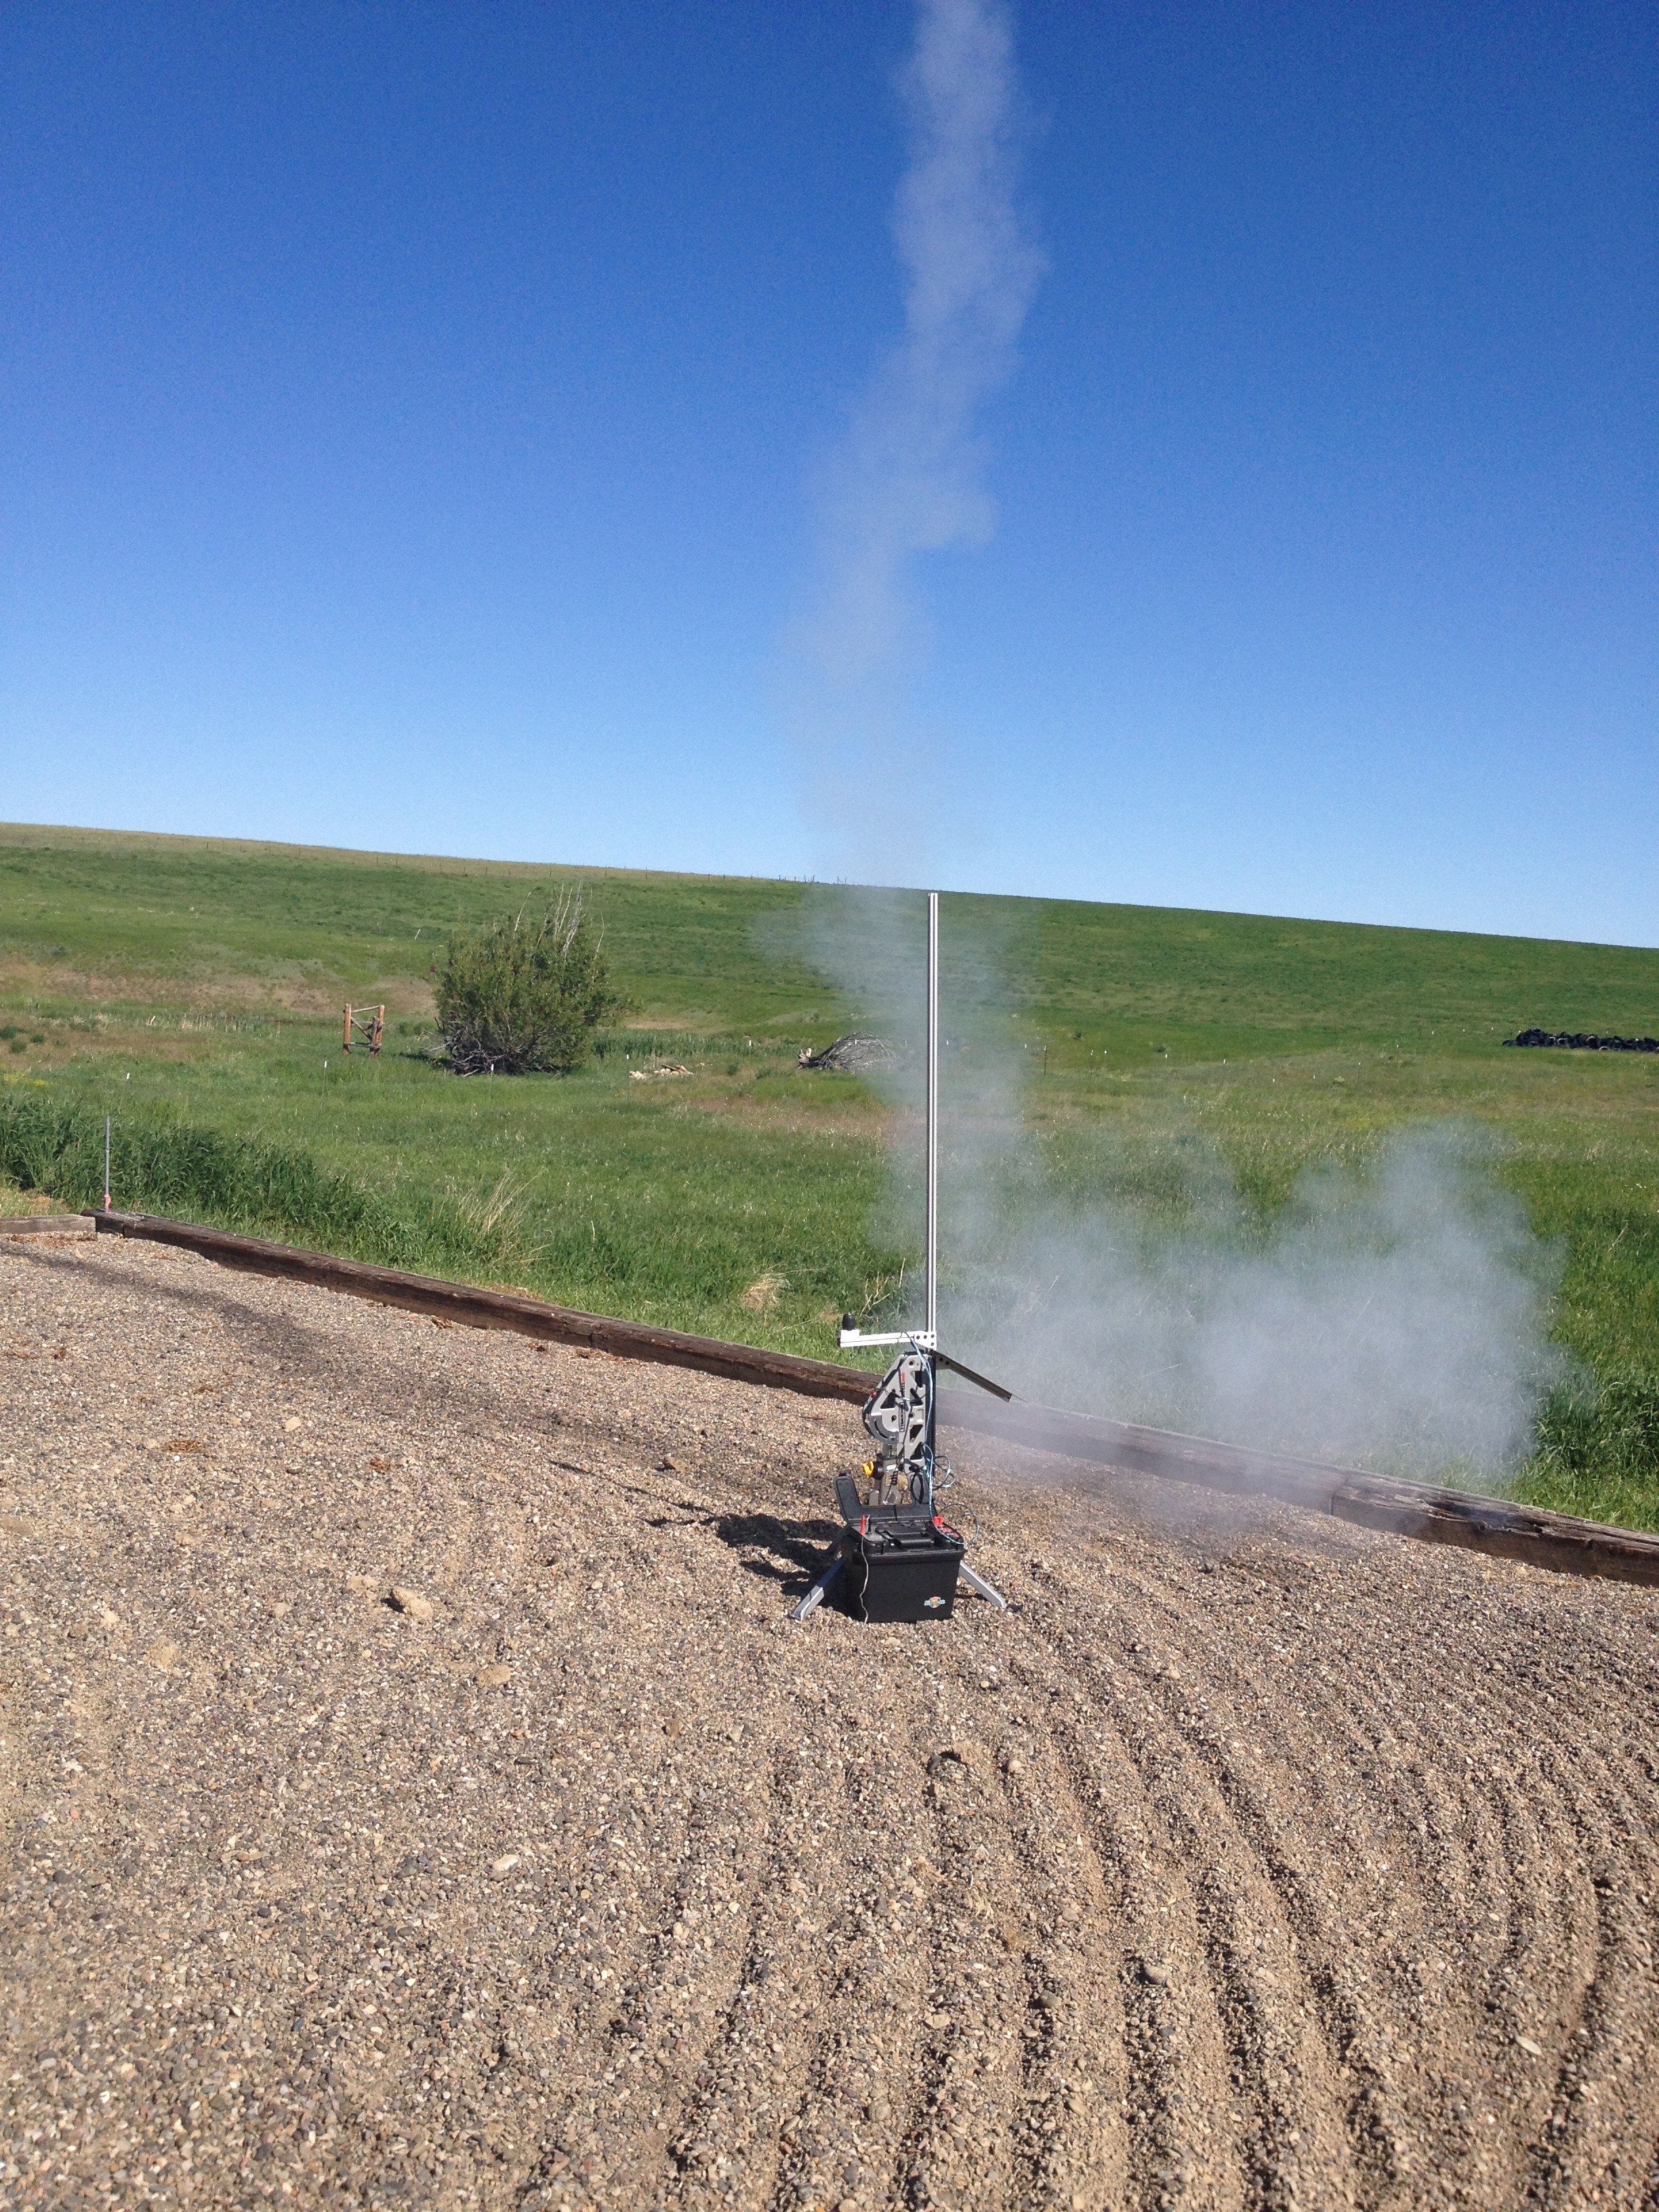
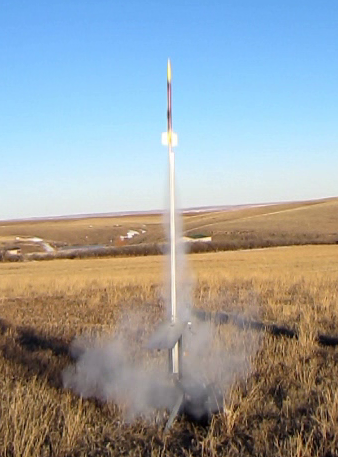
There was no delay between launch and ignition, and the rocket wasted no time in accelerating off the pad into the sky!
As the rocket climbed, it hit a layer of wind and weather cocked over the top of us. As one observer commented, it looked like an ICBM laying over after launch. As it continued to curve over, I was beginning to think we were going to have bad ending, but the delay finally burned through, and the deployment charge popped the nose cone out and the chute popped. It then drifted down for a landing in the field about 200 yards away from the launch pad.
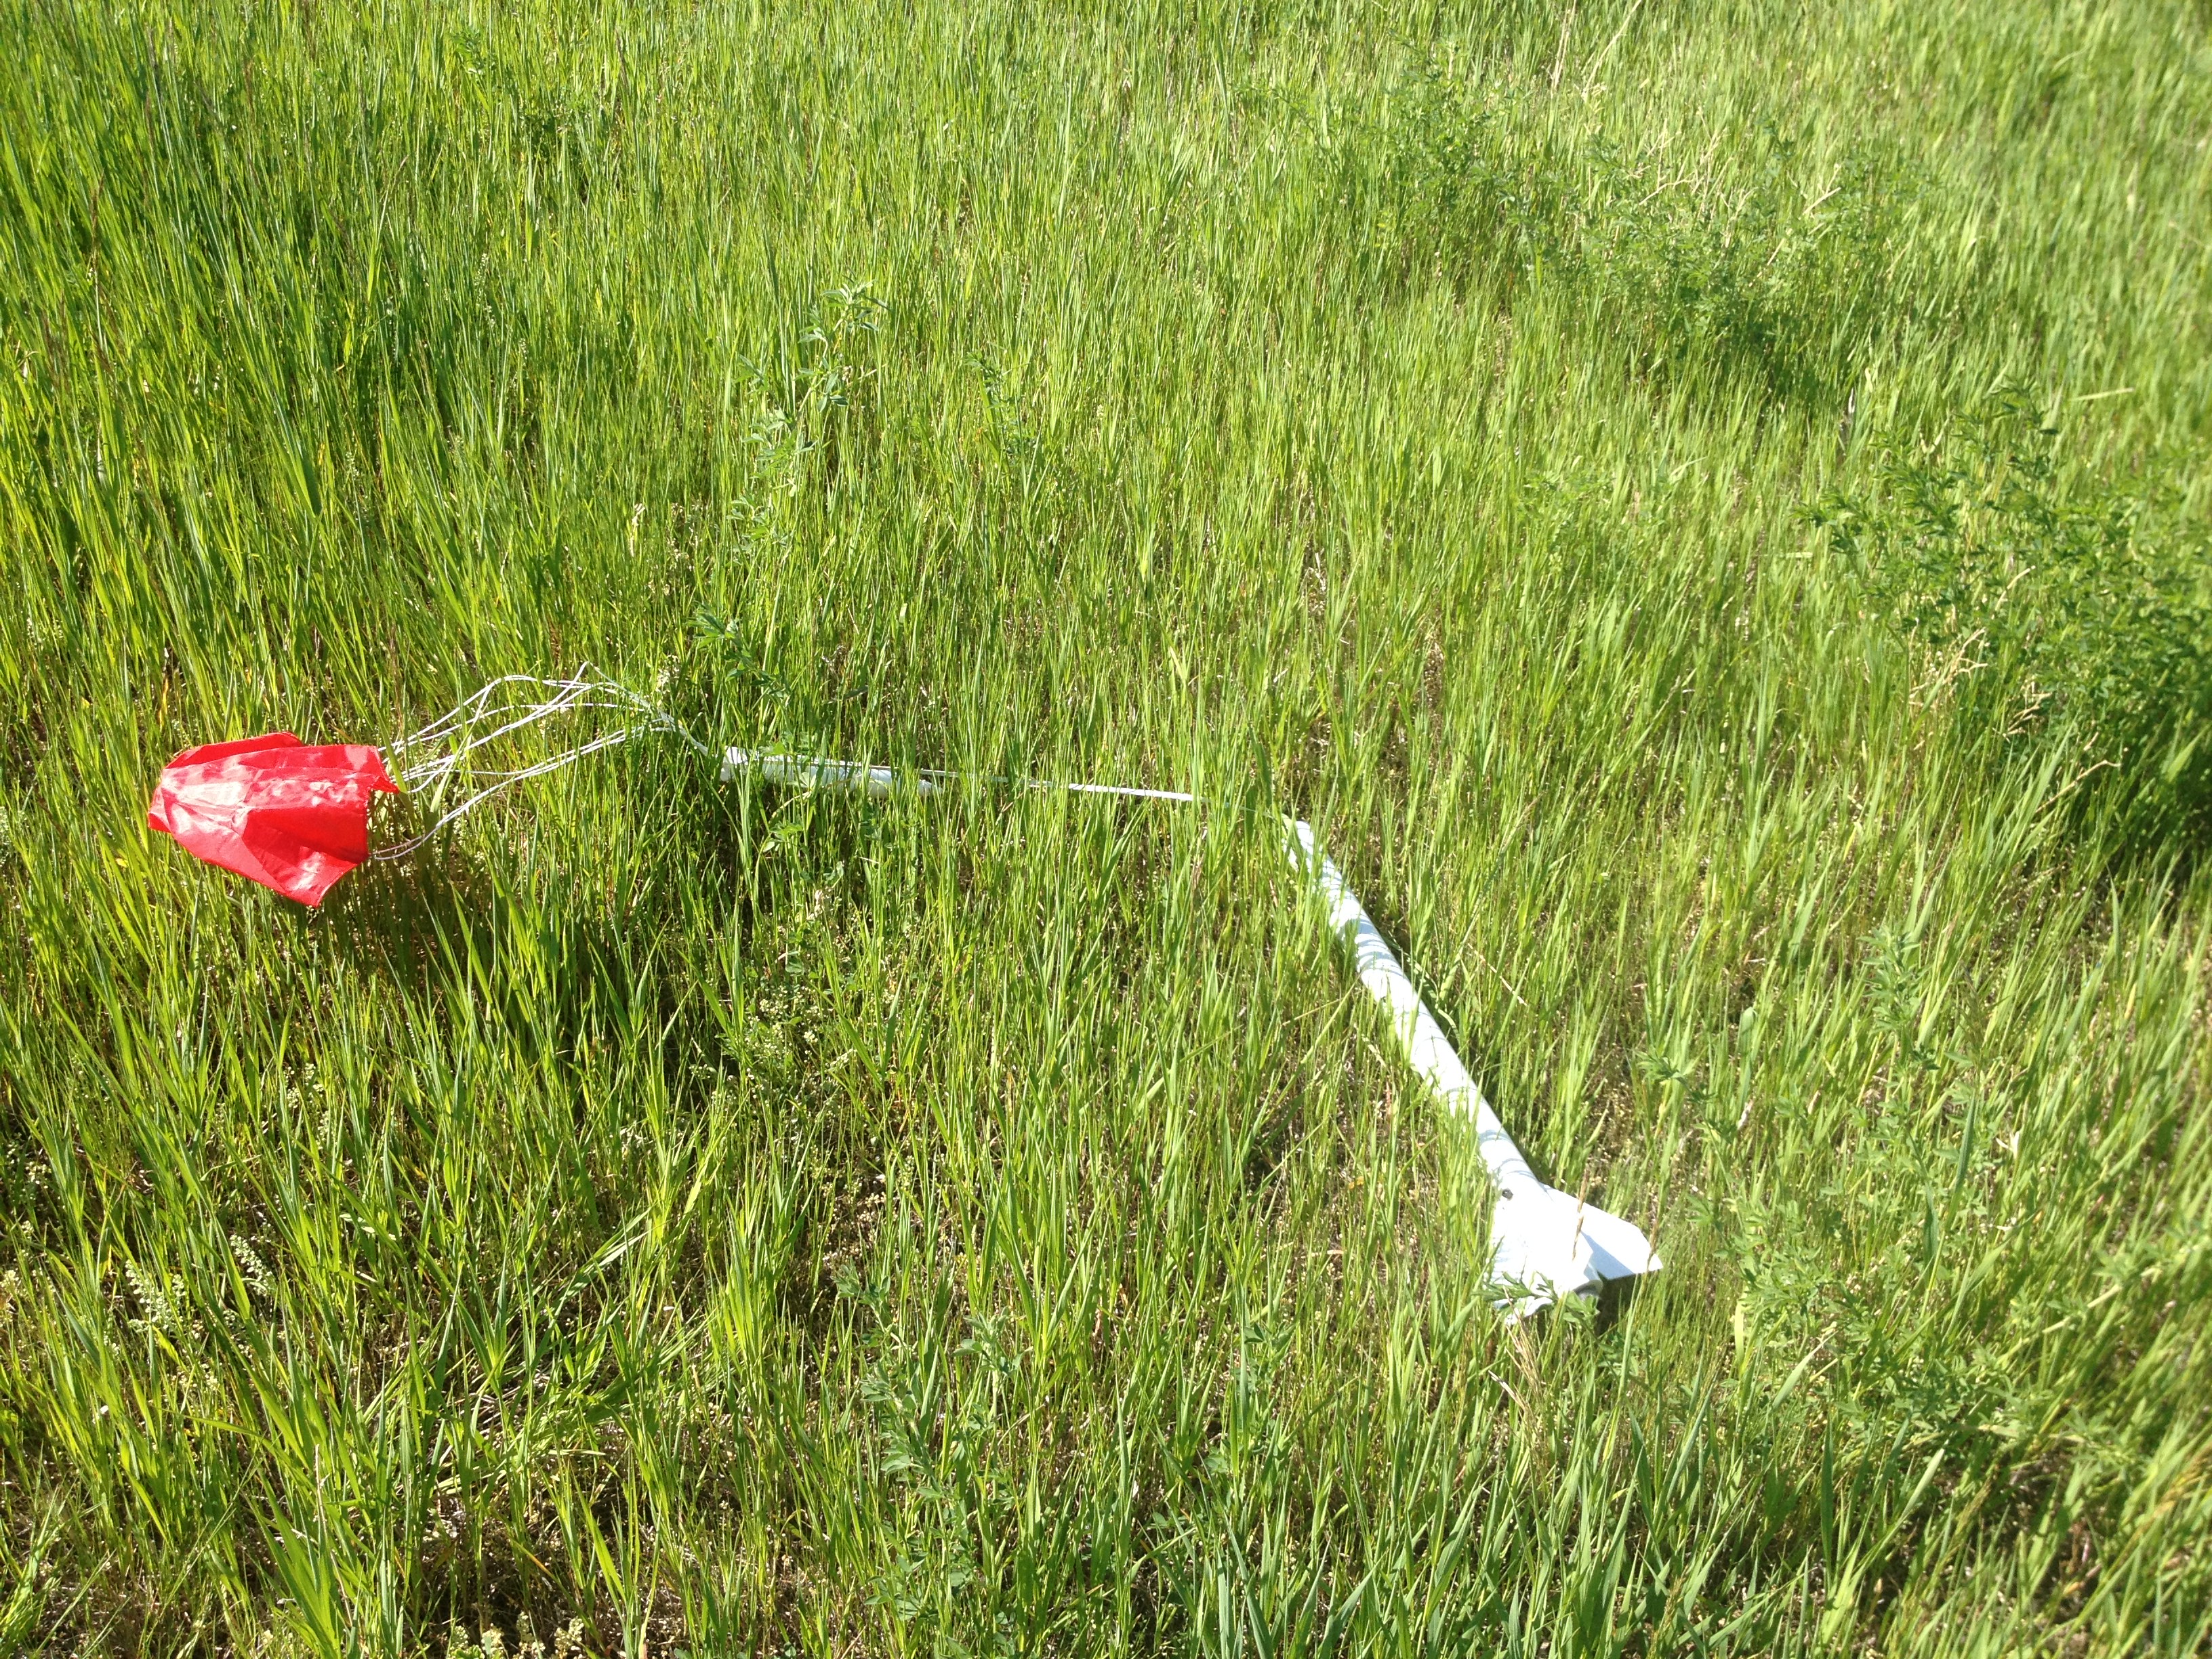
All parts present and accounted for!
After inspection, it appeared that rocket had survived with no damage other than two loose fins on the side that impacted the ground. This was easily fixed and the rocket is ready for its final painting and hopefully many more flights in the future.
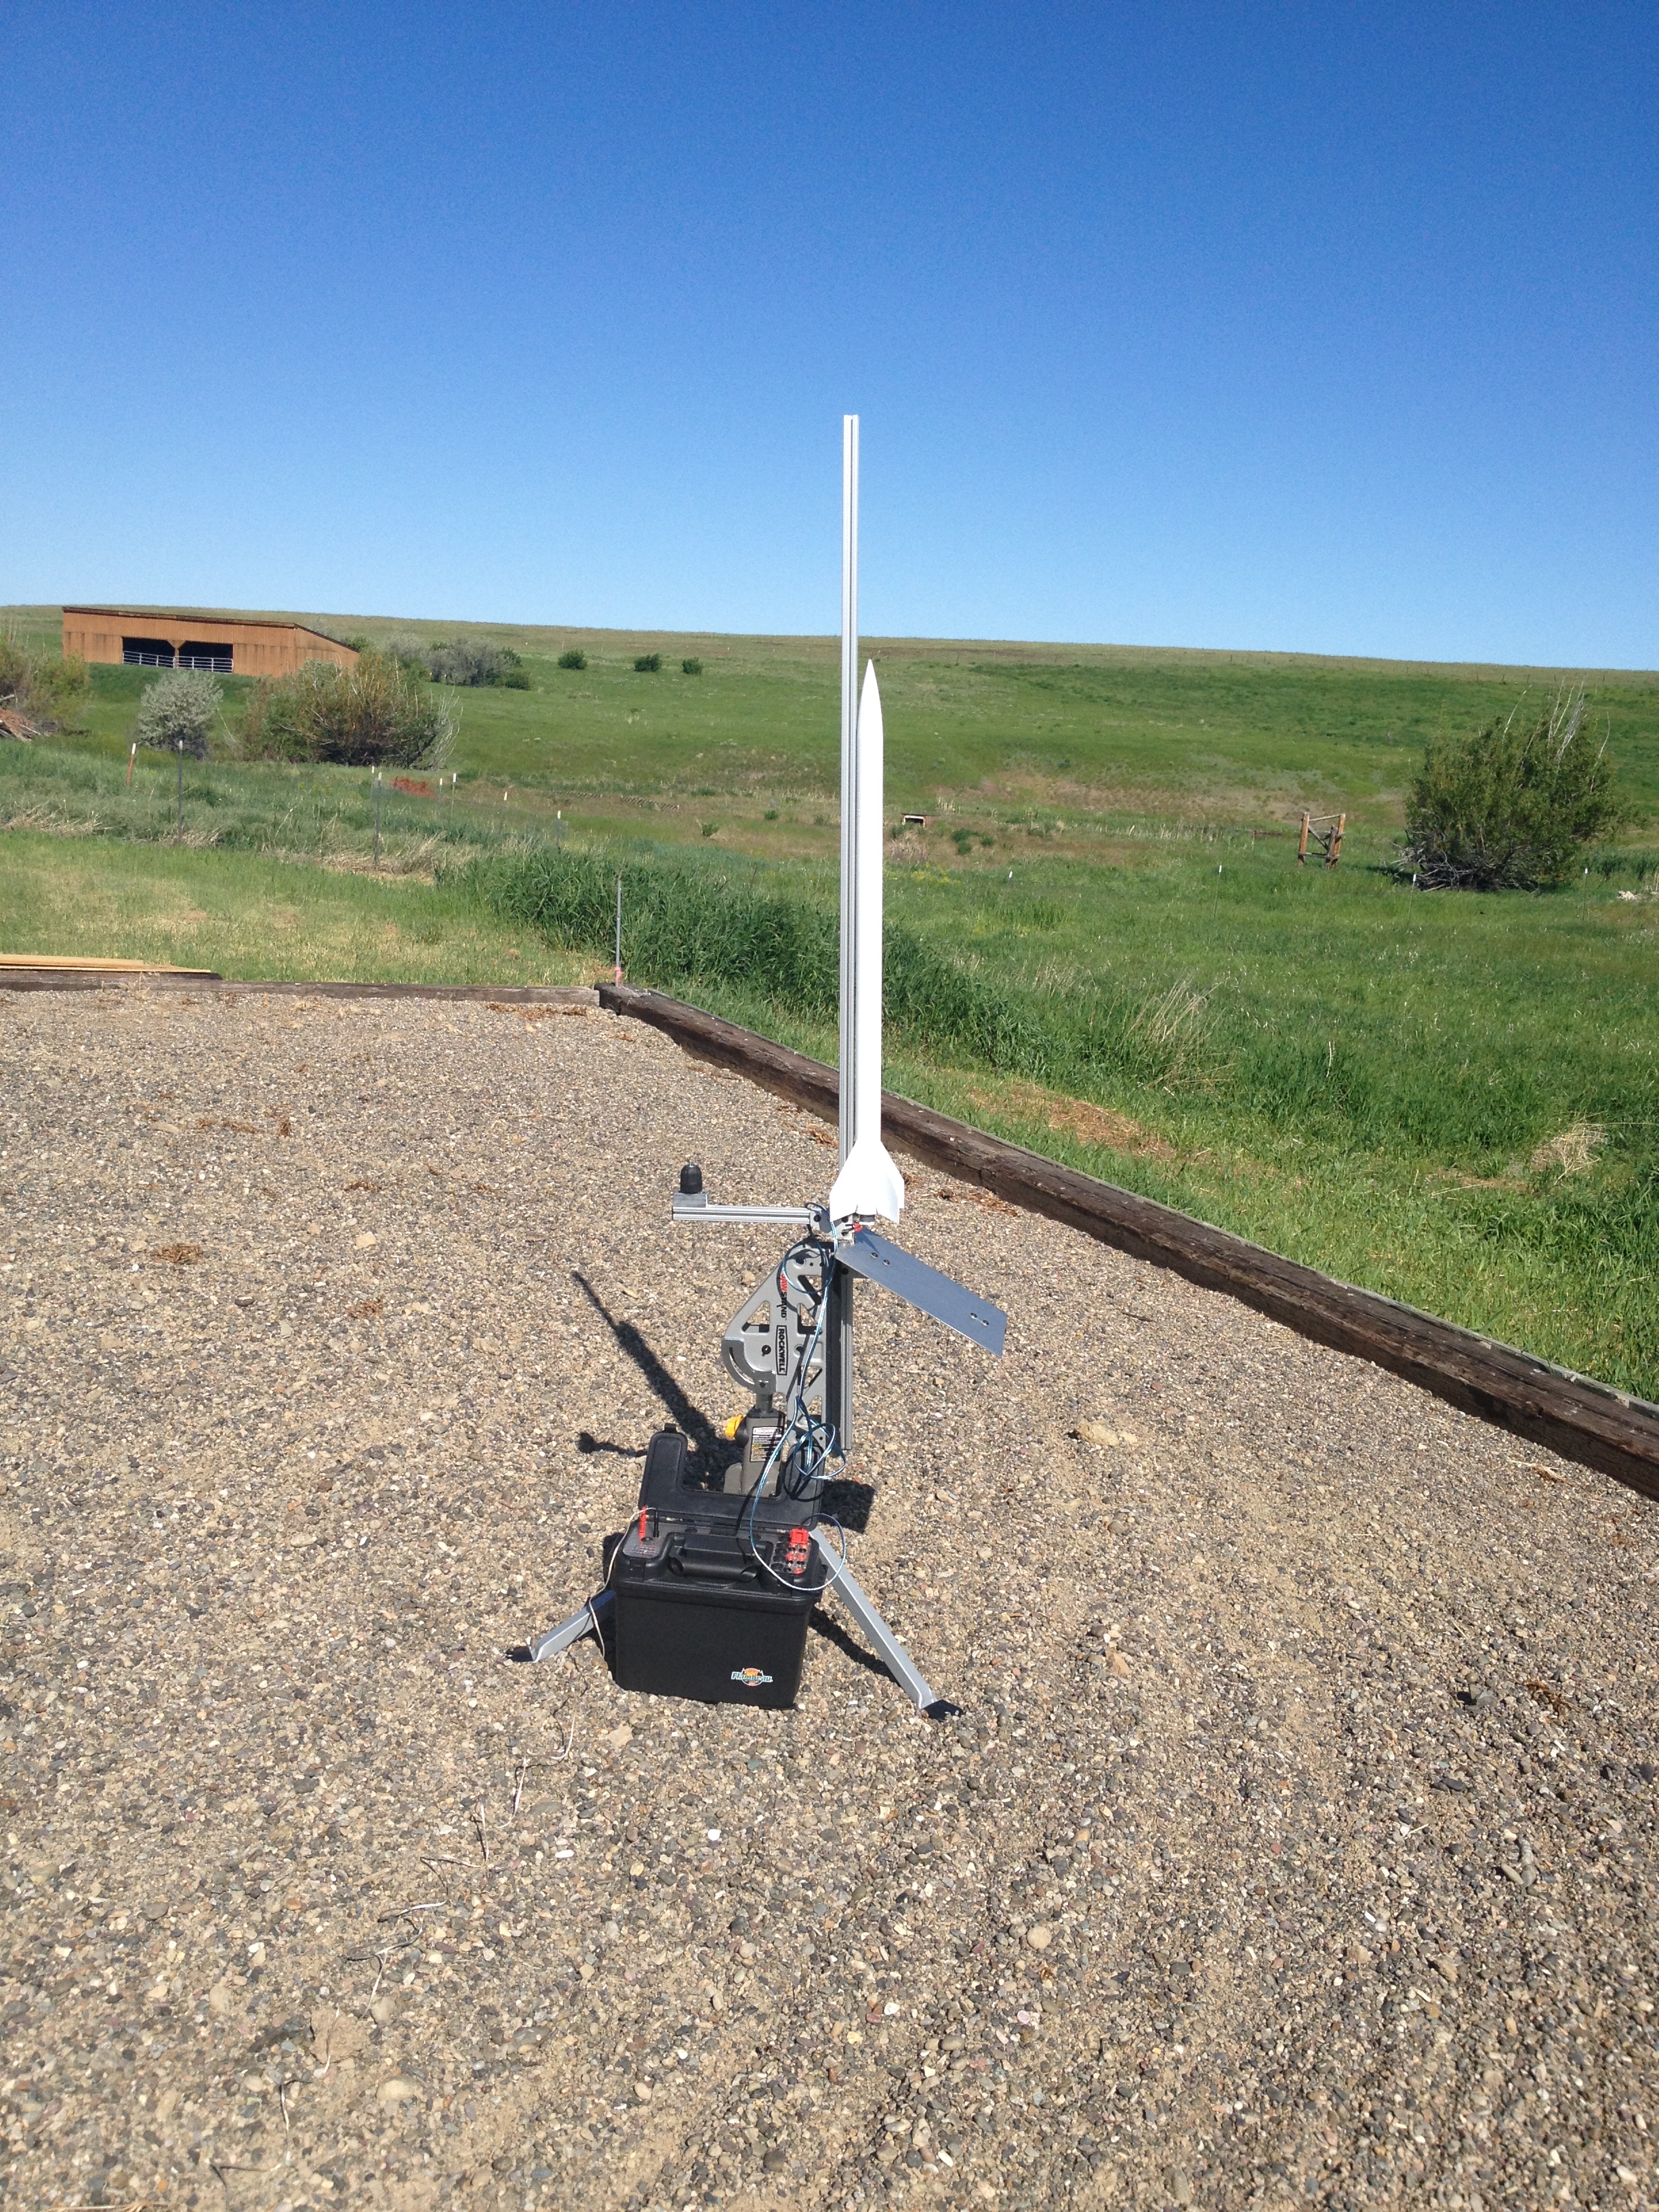
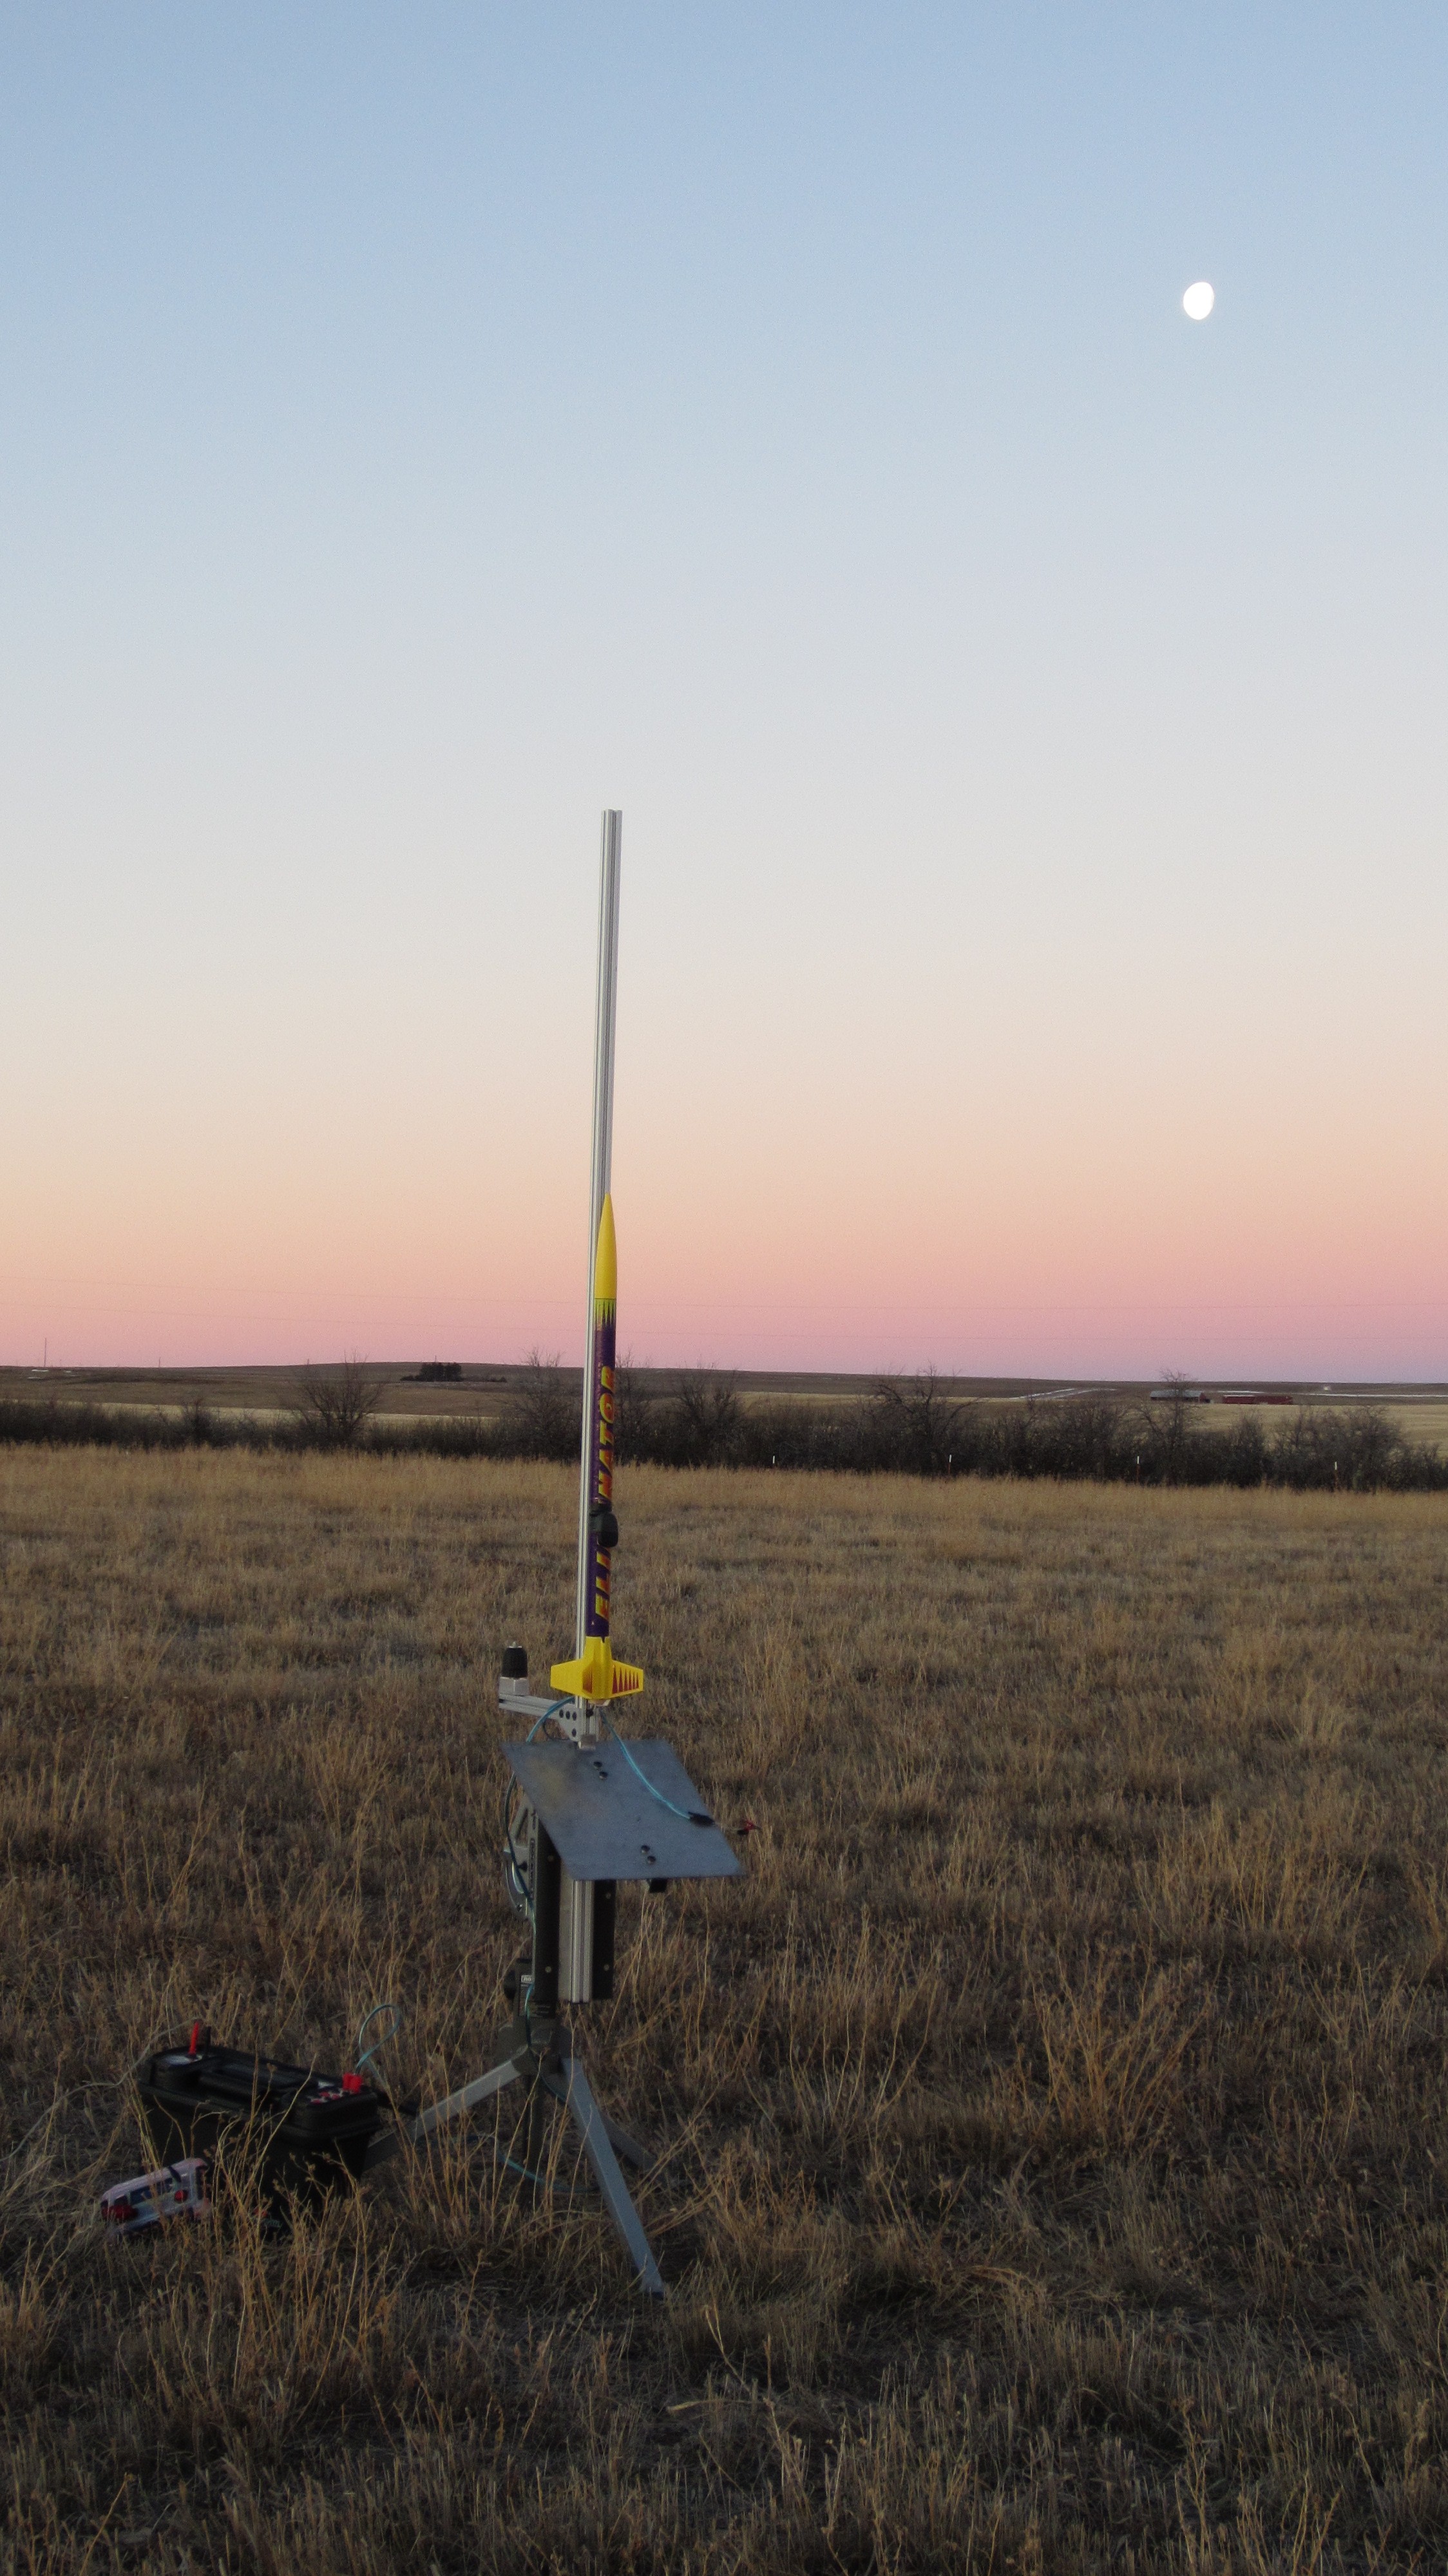
After completing a simple Estes Eliminator kit (modifying it with rail buttons rather than the standard tube guides) and purchasing some E9-6 motors, I was finally able to test my new rail launch pad. The pad is made using a Rockwell JawStand for the base. This gives an adjustable head to tilt the rail if needed, and also makes it very easy to load the rocket by laying over 90 degrees. I then attached a 6 foot long piece of 80/20 1010 rail to the head using a sheet of 1/4″ aluminum and 80/20 connectors, making a very stable and secure mount. The last piece was the blast deflector which I fashioned out of 12 gauge stainless steel mounted to a 60 degree 80/20 connector and another piece of 1010 rod. I ended up loosing a little over a foot of the rail with the mounting setup I used, but it should still be long enough for the type or rockets I’m currently using.
In order to be able to use the pad with rockets with standard tube type launch lugs, I installed an additional piece of 1010 rail off the back side of the upright and mounted a drill chuck vertically with a 1/8″ rod and stainless steel blast deflector. Over all, I’m very pleased with how it turned out. I even picked up an 8 foot length of 1010 rail in case I need a longer rail for a larger rocket in the future!
The weather has not been conducive to launching rockets (winds over 30 mph), but it seemed to be cooperating this morning with only a light breeze. I was up and had the pad setup before the sun cleared the horizon, and was all set for a sunrise launch. As the sun finally hit the launch tower, I pushed the launch button and was rewarded with nothing. I had noted that the launch controller’s screen was blank, but figured it was just the cold temperatures. It was making the proper sound notifications for the launch sequence, and even after changing out the battery to a fresh one, it still wasn’t displaying anything on the screen. The larger problem was with the relay system in the battery box. Apparently, everything shifted at some point and the cuircut I have been using to convert the 5 volts from the controller to the 9+ volts needed to trip the relay had wires pulled out of the board. After a few frustrating minutes of trying to get a field expediant work-around, I finally took everything down and returned home to work where I could at least feel my fingers,
Once in the heat, I found that there were numerous issues with the battery box wiring and managed to blow the fuse in my last functioning multimeter trying to trouble shoot. The wind also began to pickup, and I decided to rig a quick fix using some aligator clips, a 9 volt battery and 30 foot piece of speaker wire. It wasn’t pretty, but it seemed to work.
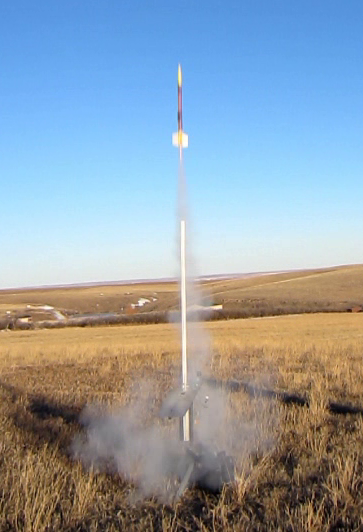
Once I had everything set back up and connected, I loaded the rocket on the rail, hooked the clips to the ignitor, started the cameras, and used the 9 volt battery to trigger the relay. The 12 volt battery did its job as usual and there was almost instantaneous ignition and the rocket accelerated of the pad with out issue! It did begin to tilt into the wind, and as it gained altitude, it continued to lay over until it completly on its side at apogee. Despite this, the parachute deployed with the motor’s ejection charge and the rocket began to drift back towards the launch site. It appeared that the rocket was set for a landing very close to where it lifted off, but I then found one of the possible causes for the tilting at the end of the flight. There was a layer of much higher winds a few hundred feet up, and when the rocket entered that area, it was quickly blown over a quarter mile away, where it finally came to rest.
Rocket almost horizontal just prior to apogeeEjection charge firing!
No damage was done to the rocket or on-board camera, and the rail system worked perfectly, so overall it was a successful test! I was also able to get the controller and battery box re-worked and they seem to be functioning correctly and the moment.
Here is the launch video for your viewing pleasure!
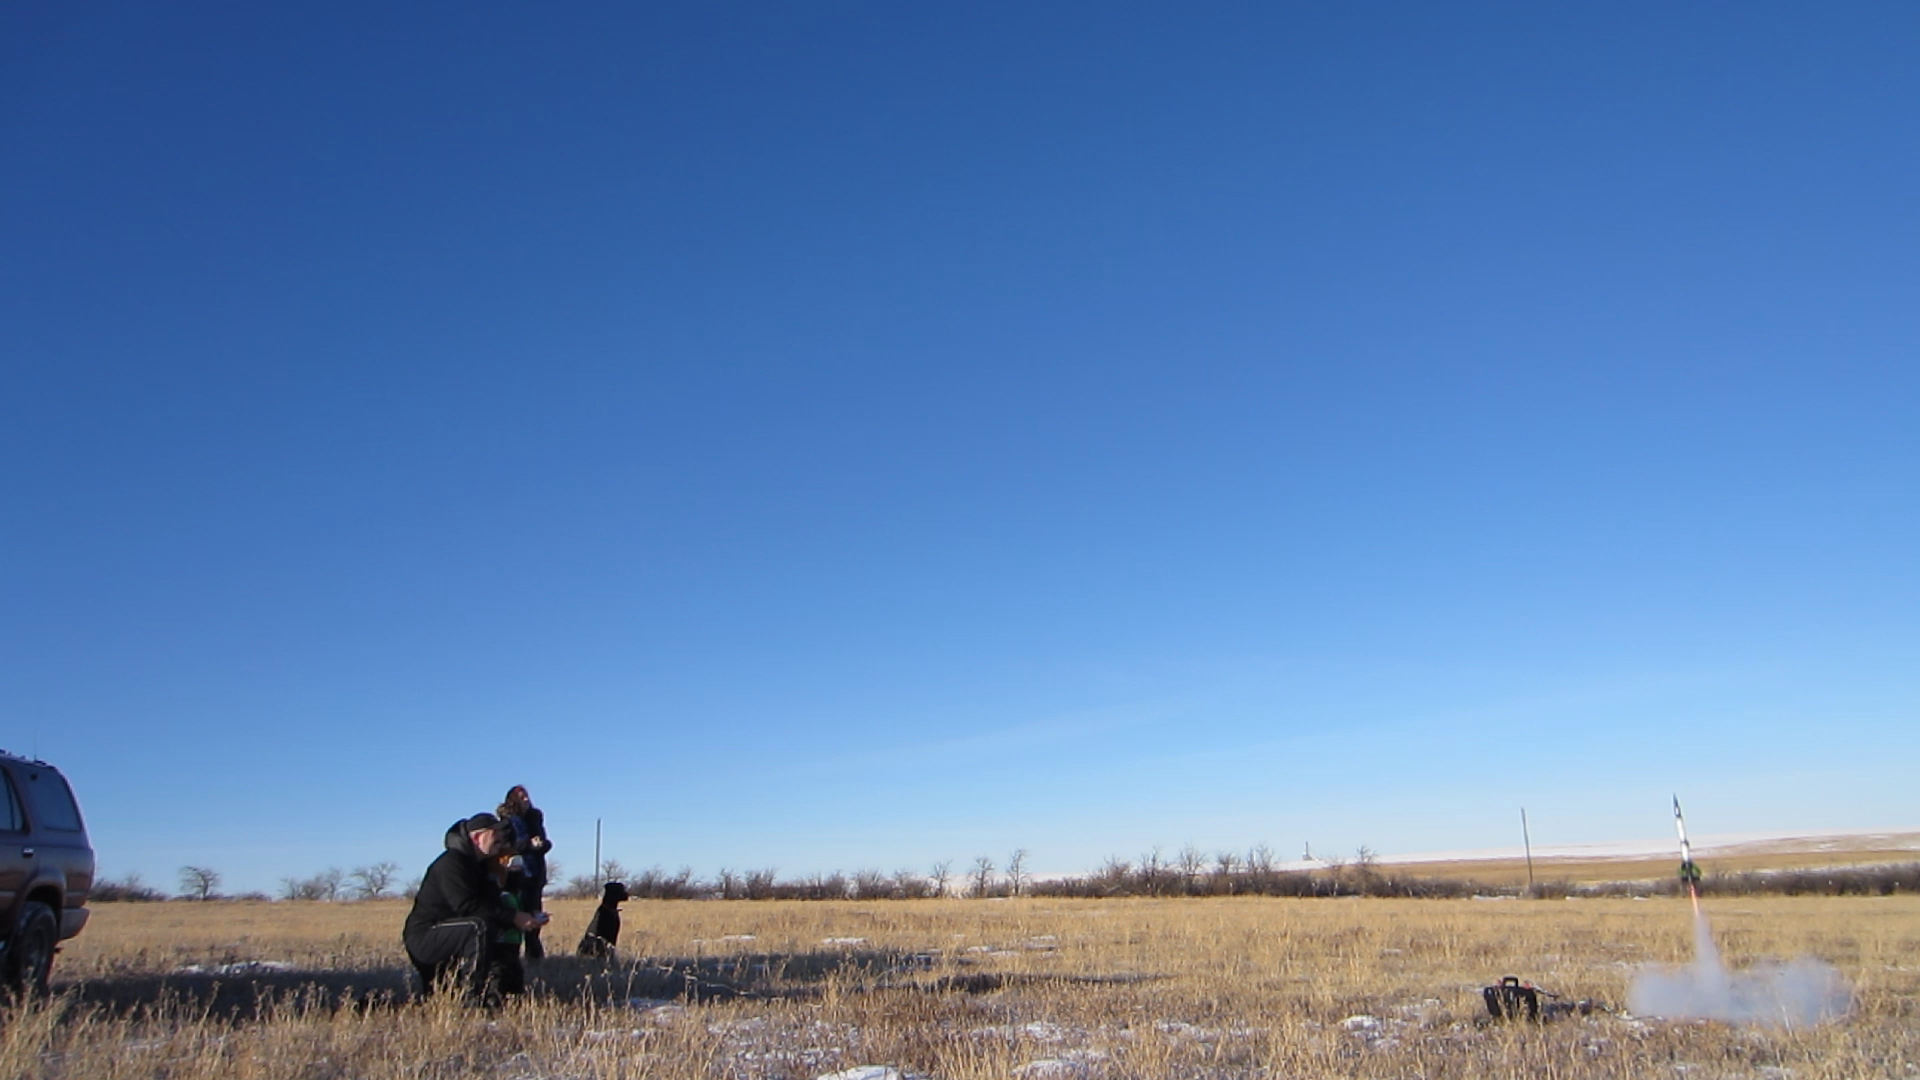
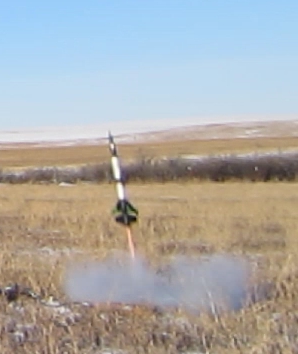
As the day dawned bright, sunny, and with just a slight breeze, it seemed the perfect time to launch some of Iain’s new rockets. At 25 degrees, it was brisk, but not freezing.
A total of five rockets were launched with only one failed ignitor, which was easily replaced. All rockets were recovered without damage, although two chutes failed to open.
The MRLC launch control system continued to function as expected, and we were able to successfully test the continuity check function on the battery box!
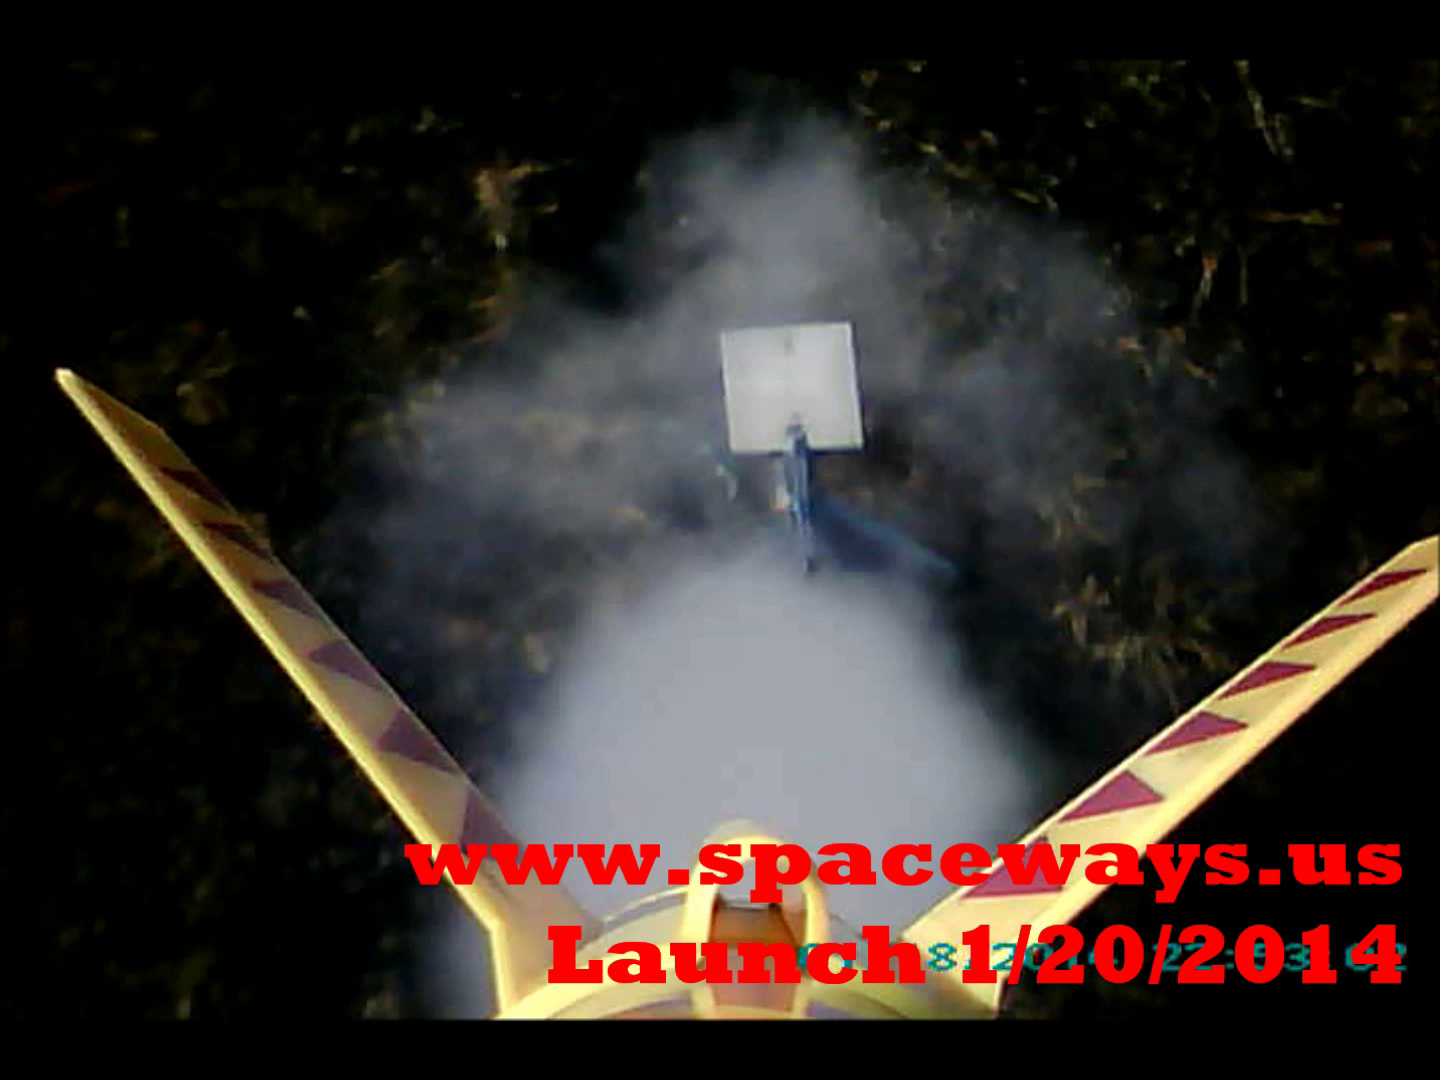
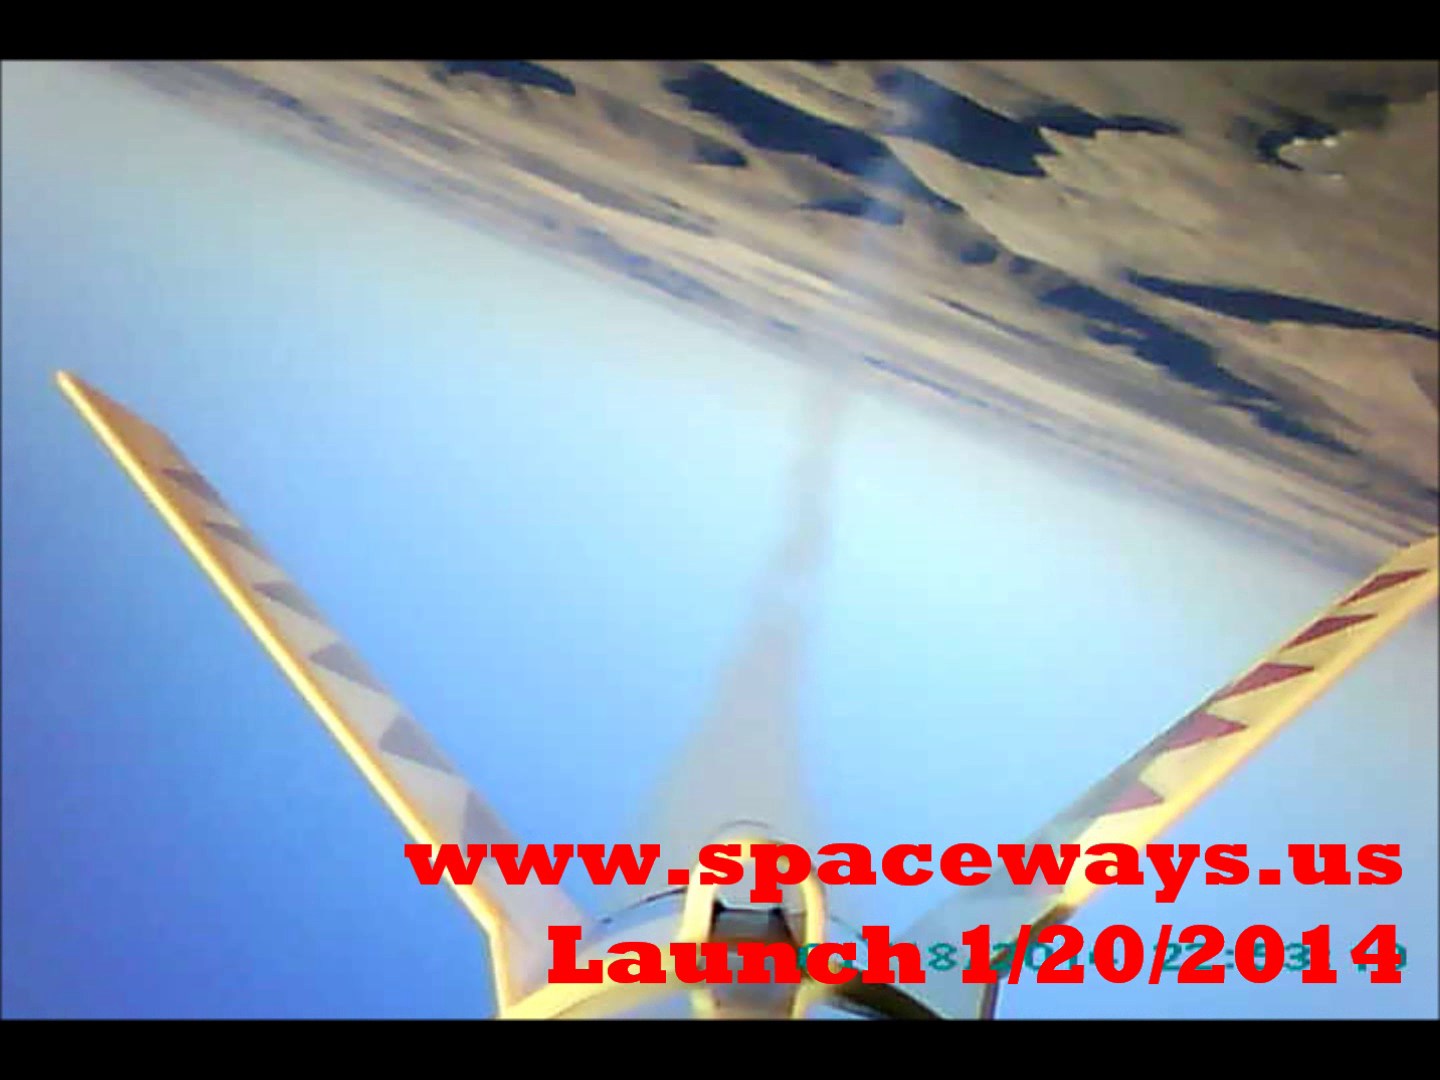
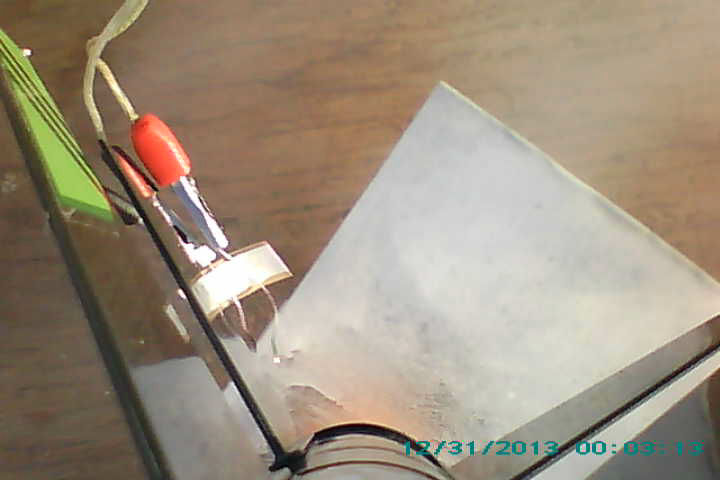
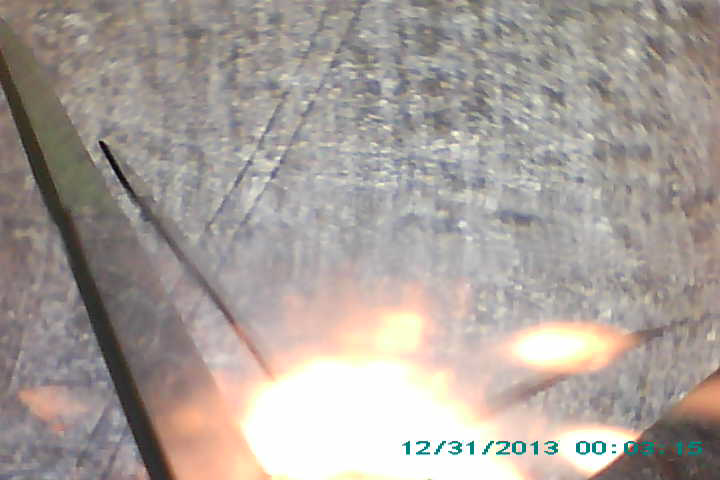
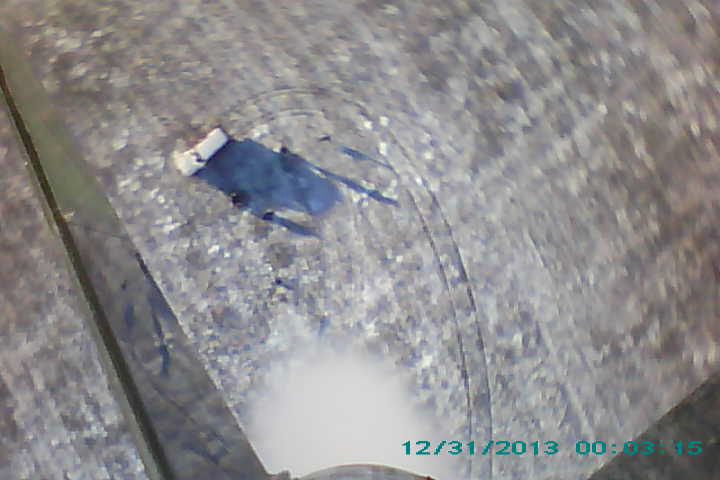
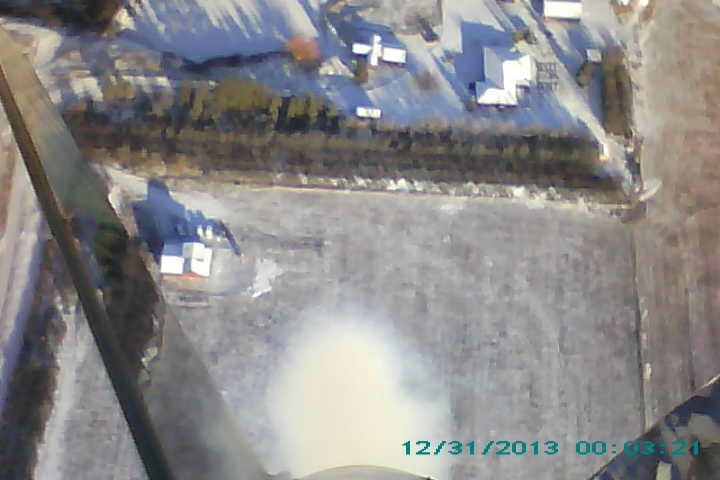
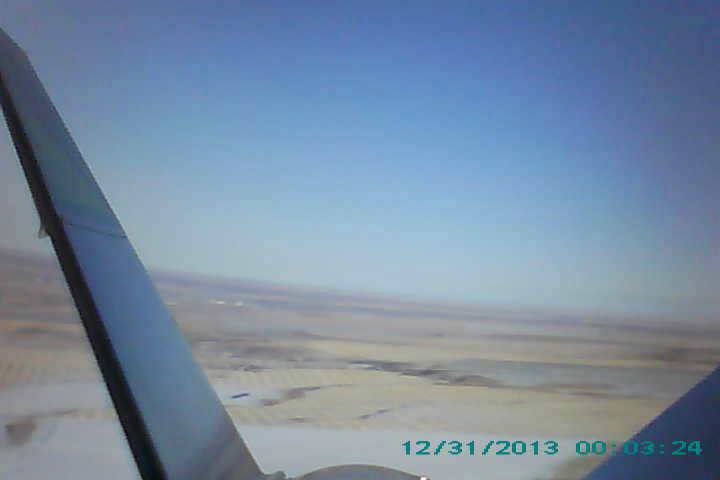
We used the 808 Car Key Camera to document the flight of the L.G.M 0095 rocket with Booster-55. We used C-6-5 AND D-12-0 Estes rocket motors, and recovered the rocket about 200 yards from the launch site! The following are some stills from the launch and a video at the end. (Note, the date and time on the video is incorrect.)
The ignition of the 2nd motor and ejection of the booster!The launch site from the air.A great view of the houses from near to top of the flight!A view to the north as the rocket begins to layover.Another view as the rocket descends.
This test flight incorporated the 808 Car Key Camera to document the flight, along with the first use of the full MRLC system controller and ignition system prototypes.
The launch was a success and the rocket and camera were recovered without damage.